How to Draw Eye – Traditional Drawing Approach
In this video lesson you will discover How to Draw Eye using traditional drawing approach perfected by generation of the Old Masters, as well as how to draw with confidence, understand shades values and avoid mistakes in shading.
Enroll in the Drawing Academy Course
Pay once - Enjoy forever!
Only $297
The Old Masters about drawing
From the time of the Renaissance back in the 14th century, fine artists had already stated the purpose of drawing and fine art. The purpose was in portraying nature. In old texts of Cennino Cennini, an Italian painter whom lived circa 1370-1440, we read that a fine artist must strive in his art, as much as permitted by his skills, to portray nature in all its likeness. Cennini also pointed out that the best teacher for a fine artist is nature and the best drawing exercise a fine artist can have is – to draw from life.
In the time of the Renaissance, the word “drawing” had a much wider meaning than we have today. When Giotto Vasari created the art academy in 1560 in Florence, Italy, this institution was called, “The Academy of Drawing.” In his book, Lives of the Most Excellent Painters, Sculptors, and Architects, Vasari also used the term “drawing” as the description of the three arts: architecture, sculpture and painting.
Making multiple drawings from life will help you to progress in this subject. There is one well-known story where an already famous Russian fine artist named, Illya Repin, whom had graduated from the fine art academy with a Degree of Distinction, came to study under the famous art teacher, Chistiakov, to learn how to draw eyes once again. This shows that it is never too late to learn how to draw. Even if you have graduated from the art academy and achieved recognition and success as a fine artist, you can still practice drawing and take lessons to improve your drawing skills. Chistiakov once said, “If you draw 100 heads, you have a collection; if you understood how to draw a head, you have a skill for life.”
Drawing with confidence – The classical drawing approach
If your ambition in art to become a proficient fine artist, you need to concentrate on constructive and analytical drawing. Such drawing requires you to understand the rules of linear construction, the shapes and volumes of depicted objects and, in addition, possess the necessary technical skills of drawing. Such skills include:
– The correct way to hold a pencil;
– Confident and artistic pencil strokes;
– Knowledge and experience of hatching and cross-hatching;
– A trained eye that can recognise and analyse the smallest differences in tonal values;
– Artistic drawing approach;
– Ability to communicate your knowledge about the object through the medium of drawing;
– The gift of communicating your feelings through drawing.
As you can see, there’s nothing mechanical or artificial there. Such skills come only with practice.
If you want to become a professional fine artist who can influence people’s thoughts and emotions with art, then you need to understand that it is better to leave an artwork unfinished than over-render it to perfection. Avoid the common mistakes of the fine art atelier. Do not make a drawing where nothing is left for the imagination. Do not draw every single detail with equal attention. Concentrate on the main focal points of your drawing – while leaving the rest a bit unfinished. You can also employ the method of making some parts of your drawing off-focus. Make such parts softer, with less contrast and with undefined edges. This will help to point the viewers’ attention to places you want them to look at.
Understanding shades values
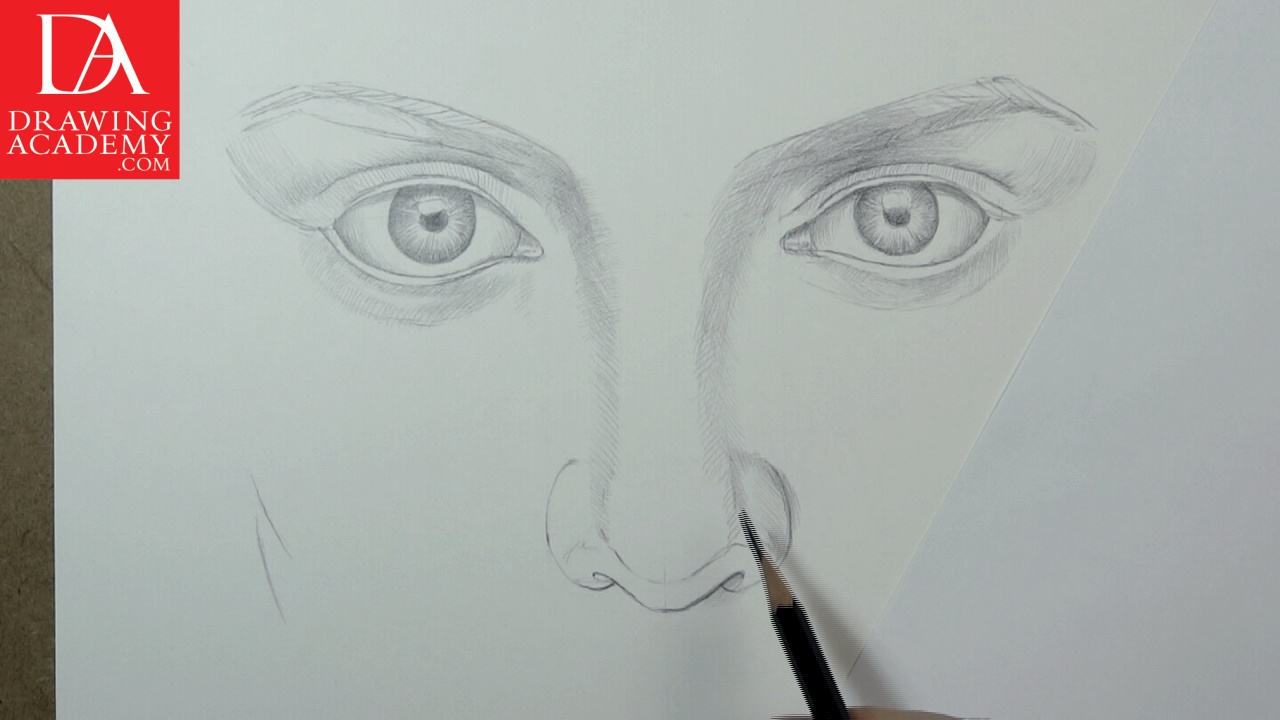
When you think how to draw eye, keep in mind that shades rendering helps to show the eye’s shape and volume.
Shade rendering has very simple rules; these rules are universal. It doesn’t matter what objects you draw; these rules apply in all cases. There are only five elements you need to remember to make a professional tonal rendering:
1. The common tone;
2. The core shadow;
3. The form shadow with reflected light;
4. The cast shadow with an accent;
5. The highlight.
Any three-dimensional object, like an eye, for example, will have all five elements listed above if you separate it and place on the surface under some source of light.
Let us recap those elements once again and describe them in more details. The common tone is what the object tonal value would be if it was lit from all directions with a diffused, non-directional light. Imagine that uniform, dimmed light comes from all directions, the object will not have any highlights or shadows; it will be evenly toned from all directions. Depending on the colour of the object, its natural common tone will be lighter or darker than tones of other objects coloured differently. The object tonality depends on how much light the object’s surface reflects back. Dark colours reflect less light and light colours reflect more.
The common tone can be subdivided into different gradations of light and middle tones. The lightest of all will be the highlight. This is usually the place on the object that is the closest to the source of light.
The tone on the object that has the least amount of light is called the core shadow. This place is turned away from the source of light and also has very little reflected light reaching it. Reflected light may come from other objects or from the surface the object is rested upon. Nearer to the core shadow will be the form shadow. This is the place where reflected light affects shaded area. The form shadow is lighter than the core shadow.
When an object casts shadow on another surface or object and these two objects are close to each other, the cast shadow can have the accent. The accent is the darkest spot on the drawing.
It is always better to start from the accent and core shadow when working in graphite pencil. When you do tonal shading gradually, starting from dark paces, you will not run out of the tonal depth a pencil can provide.
How to Draw Eye – Avoiding mistakes in shading
I have seen students from one London drawing school, practicing in the National Gallery, sketching copies of the Old Masters. For some reason, teachers of this school did not explain these elementary rules. Students started their drawings with the darkest marks their pencil could provide, somewhere in mid-tone places, and ran out of pencil depth immediately. Within few minutes, the artwork looked like an old-fashioned photocopier print that gave only pitch-black marks and white gaps. The simple most basic concept of the three tones in the drawing – the light, the mid-tones, and the shadows were missing from this school’s teaching.
I also have to say a few words about the quality of tonal rendering and the best practices in tonal finishing. There are some very respectable academies and atelier in Italy and the USA that above all, praise the very smooth idealistic finish of artwork. They practice technical rendering that pays equal attention to the main parts of the artwork as well as secondary areas. While this gives a highly polished and realistic look, this approach delivers a stillborn picture. There are no emotions, feelings or thoughts left in such artworks. The pure purpose of such art is to mechanically copy the world around us. This polished finish is also used for salon style paintings that have very little to do with reality. Russian classical fine artists of the 19th century were very much criticised over this finishing technique.
When it comes to drawing eyelashes, many amateur artists institute one common mistake; they make curly strokes to imitate them. Like every three-dimensional form, eyelashes have shape and volume. Observing the model and understanding how these shapes formed will help in portraying a realistic image. Here is one trick: it is better to underdo the eyelashes when drawing them than overdo them. You are not in the makeup business unless you are working on a beauty product poster. Another tip is to make more of an effort on the upper eyelids eyelashes while leaving the lower eyelashes less rendered.
There is a big difference between passive copying and active drawing.
Keep practicing and draw from nature and models. It will help you improve your drawing skills.


