How to Draw From Life – Silverpoint Portrait
In this video lesson, you will discover How to Draw From Life, making a portrait in silverpoint. This video will also cover such topics as what the metal-point technique is, what materials are used for silverpoint and metal-point, how to prepare a ground for silverpoint and much more.
Enroll in the Drawing Academy Course
Pay once - Enjoy forever!
Only $297
How to Draw From Life – First Steps
Making Life Sketches from a Model
When it comes to the first steps of the “How to Draw From Life” video lesson, we begin the portrait drawing with a quick life sketch of the model. This sketch will help us to familiarize ourselves with the model’s head shape and her facial features.
This silverpoint artwork is done on toned paper.
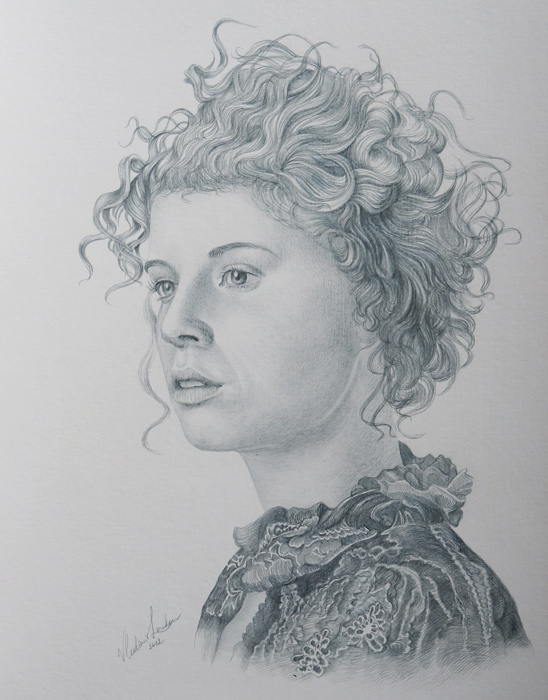
The paper is coated with a light, pink-grey ground. Various metal-points were used for this artwork including the dead-soft pure silver stylus.
The easel is standing in front of me, facing the model, and the drawing board is almost upright. When the drawing board is in the vertical position, it is much more convenient to employ the ‘candle’ pencil grip.
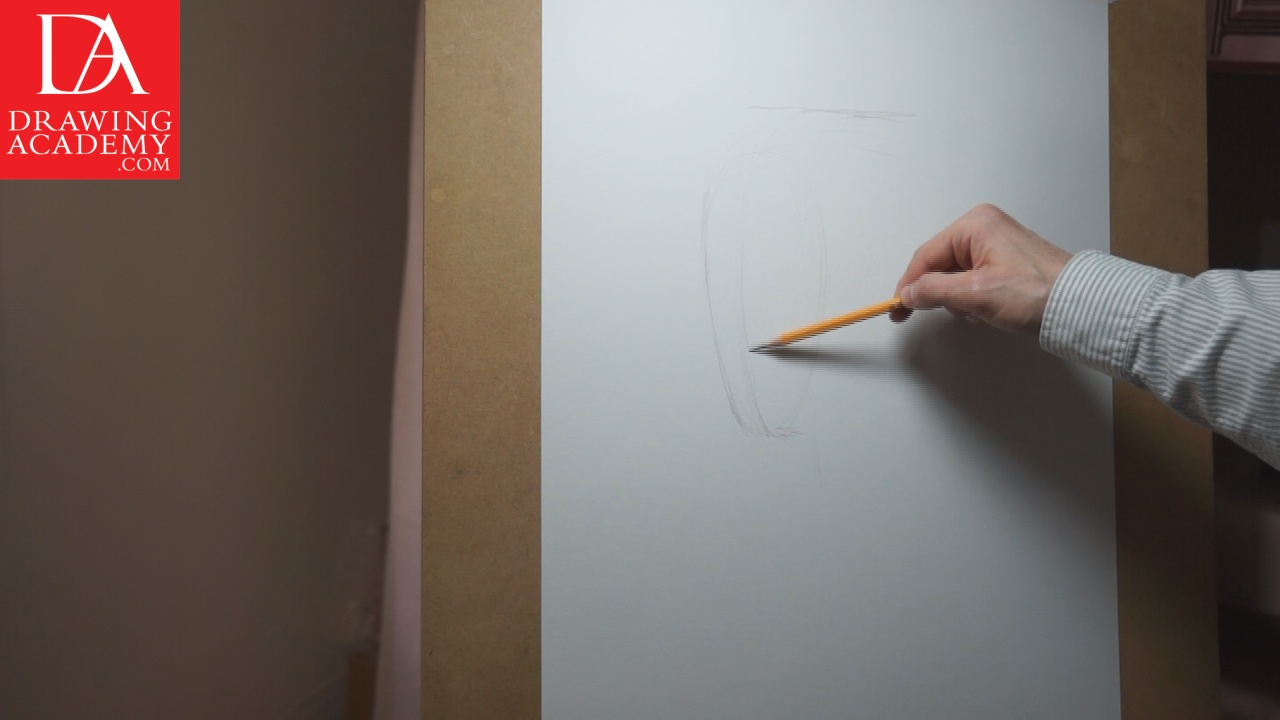
Such a grip allows you to stand further away from the easel while drawing, which gives you a better view of your entire artwork and more freedom for hand movements.
Talking of How to Draw From Life, a pencil can be used as a measuring tool for checking proportions, ratios and angles. To do this, you extend your arm, holding it straight, and with pencil in the hand, align it to the model, then move back to the drawing, checking the angles of lines.
The human head proportions and anatomy are well explained in the Drawing Academy video lessons. Please check corresponding videos to refresh your knowledge of how to draw a portrait.
How to Draw From Life – Metal-Point Tools
There are various metal-point tools were used for this drawing.
The Nickel-Silver stylus is a 0.9 millimeter thick wire made of copper alloy and also includes nickel and zinc. It makes quite a dark, grey line on coated paper.
Another metal-point is dead-soft, silver. It is a pure 999 silver stylus with the same thickness as the 0.9 millimeter. This tool also leaves dark, grey lines on a ground.
The pure silver metal-point also comes in 2 millimeter thick stylus. It has two working ends shaped differently – one end is cut under 45° and another is cone-shaped.
Last but not the least, is the golden-point stylus . It is the most expensive of them all as it is made of pure, 24-carat gold.
All these styluses would only leave marks on a specially grounded paper.
Ground For Metal Point
There are many recipes of making a ground for silver point drawings. For this drawing, I used one that has simple ingredients and is fast to make.
White Designers Gouache is the main component. In fact, all other ingredients are optional.
Sepia Gouache was added to give a brownish-grey tint to the ground.
Also, Titanium White pigment added abrasive qualities to the ground surface.
Gouache has gum arabic as a binding medium. The strength of this binder is sufficient to take a bit more of the white pigment – this time, Titanium White. Too much of an additional pigment would require more binder. You can dilute gum arabic crystals in warm water and add it to the blend if you feel that a stronger solution is needed.
All components are mixed thoroughly to achieve a uniform consistency.
Silverpoint Support
Strong heavy-duty paper was used as a support for this drawing. Two layers of silverpoint ground provide sufficient coating for the drawing purpose.
If you are using a rigid board as support, more layers can be applied. Every layer needs to be thoroughly dry before making another coat. After grounding the board, you can sandpaper the dry layers for a smooth surface.


