Artwork for critique by Curt, Drawing Academy student
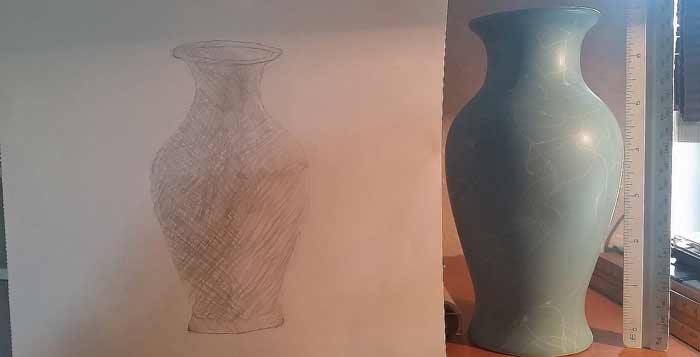
 This my first attempt at drawing a vase. I’ve included the vase itself. The widest part was at eye level.
Thanks in advance for your help.
Curt
Drawing Academy Tutors
Dear Curt,
Thank you very much for your vase drawing. It might be not perfect, but we like it! There is some quality to it that brings back memories of our own learning process.
There are no mistakes, only opportunities to improve!
First of all, you managed the overall shape very well. It is a clearly recognizable object that resembles the model unmistakably.
You also handled proportions quite professionally. The ratio of width to height and all parts of the vase are very close to the original. This is a talent that takes art students quite a time to develop.
Now, what to do to improve:
We would suggest that you concentrate on the constructive drawing first. Shading is much less important at this stage. So, skip it for now.
Think of the constructive drawing as if you are building a house. Rendering tonal values is like painting walls of the house. If the building construction is not solid, no paint will fix it. That is why you need to start from fundamentals.
So, here is the task. Can you please draw the same vase once again without rendering tonal values?
This time, apply the following steps:
1. Draw a vertical axis of the vase.
2. Decide the total height of it, and mark on the drawing the top and bottom edges.
3. Measure in pencil relative proportions of the vase (width to height) on various parts and marks those proportions on the drawing.
4. Draw horizontal axes where the most prominent ovals of the vase will be – the widest, the narrowest, at the top and at the bottom. Needless to say, these axes have to be perpendicular to the vertical axis of symmetry.
5. Do ovals in one-point perspective using the vertical axis of symmetry and horizontal axes. Decide which oval is closer to the horizon level – it will be the slimmest. The further away the oval from that horizon level, the fuller it will be. Measure the oval’s height to width ratio and apply it in drawing. Make sure the vase is symmetrical according to the vertical axis.
6. Draw curvy shapes of the vase’s outlines, connecting ovals together.
7. Draw the vase as if it is completely transparent and you can see all ovals through.
8. Fine-tune all lines, double-check all proportions and correct if required. (Do not erase all helping virtual lines; we need to see the process.)
Do several sketches with various eye-levels – above, in the middle and below the vase. Spend at least 20 hours on that exercise.
Send drawings to us and we will go to the next step thereafter.
Once again, thanks you for your drawing.
![]() Kind regards,
Kind regards,
Natalie Richy and Vladimir London
Drawing Academy tutors
Enroll in the Drawing Academy Course
Pay once - Enjoy forever!
Only $297


Thank you, Vladimir
Excellent Feedback, I will work on it as you have instructed.
Curt
Curt,
I used a vase as part of my own learning as well. Of all the drawings I have done, I think it is one of my favorites because it developed from thin air into something very beautiful! Good luck in your adventure. You will be surprised at how much and how quickly your work improves if you follow the Art Academy’s guidance!