Artwork by David Farber, Drawing Academy student
Dear Drawing Academy Tutors,
I’m having a difficult time rendering shapes tonally. I believe I am still much too dependent on hard lines to describe forms. This is why I think my drawing here appears two dimensional.
This drawing was done from a live model in charcoal. To me, it looks flat, and the shading is not very precise.
How do I improve my rendering skills so that my drawings look more three dimensional?
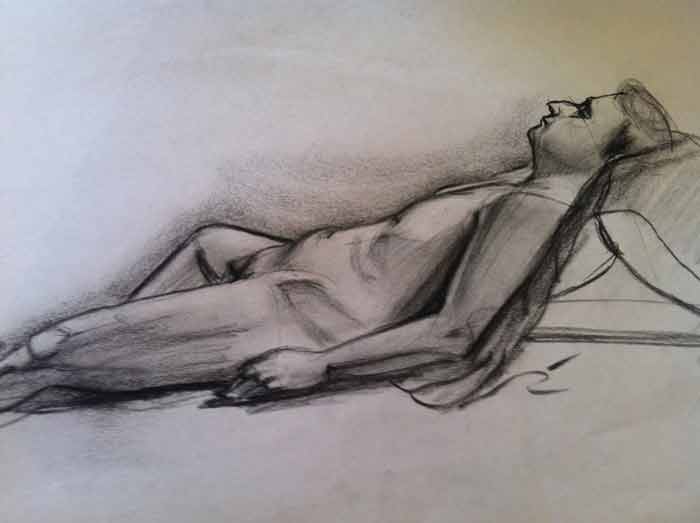
David
Dear David,
Many thanks for your drawing.
Your drawing is quite good, I like it. You have an understanding of the proportions of the human body and some knowledge of human anatomy. Well done!
In regard to improving your drawing skills, you may consider the following 7 points:
1. Practice more in graphite pencil.
I understand that charcoal is a very flexible medium in term of fixing mistakes and shading big areas fast. If your aim is precision and accuracy at this stage, you may consider using graphite pencils instead.
Don’t go for a speed; speed is a by-product of excellent drawing skills not vice versa.
Other media you may try are metal-point and pen and ink. By their very nature, these media will help you develop accuracy and discipline. Metal-point and ink marks are not easily erasable, so you will have to work more thoughtfully and carefully.
With time, you will achieve a level of mastery that will allow you to move easily to other media, including charcoal. Charcoal might look impressive to start with, but it does not let you develop the same skills as a stricter medium will.
This sequence was used in the Old Masters’ time to train artists – drawing in silver-point (which can be replaced with graphite pencil) was an essential part of an apprentice’s education.
That is why in the Drawing Academy course you will see many video lessons done in graphite pencil, as well as in silver-point and pen and ink.
2. Shade in strokes along contours.
In your drawing, the direction of the charcoal strokes runs along main axes of the different body parts – arms and legs, for example. This flattens the surface of your drawing, which is your main concern here.
Such strokes do not help to reveal the three-dimensional nature of a human figure.
Instead, you need to learn to shade in strokes along the contours of the figure.
Contours are not the same as outlines. A contour can be described as an invisible, virtual line that forms a cross-section of an object’s surface; it can also be defined as any virtual flat plane that dissects the object in any random direction. Every object has infinite number of contours.
Because any contour line naturally runs along the shape of a surface, drawing along a contour helps to depict the object’s shape.
You may check the Drawing Academy videos, where I talk in-depth about this topic and demonstrate shading along contours.
3. Practice defining contours.
It might be challenging to draw along contours of a human body if you haven’t done it before. To practice defining contours, you may want to start by drawing some simpler man-made objects and depict their contours in various directions.
Hatching along contours should become your natural way of shading. Practice this technique until you are totally confident in what direction you should to apply marks when rendering tonal values.
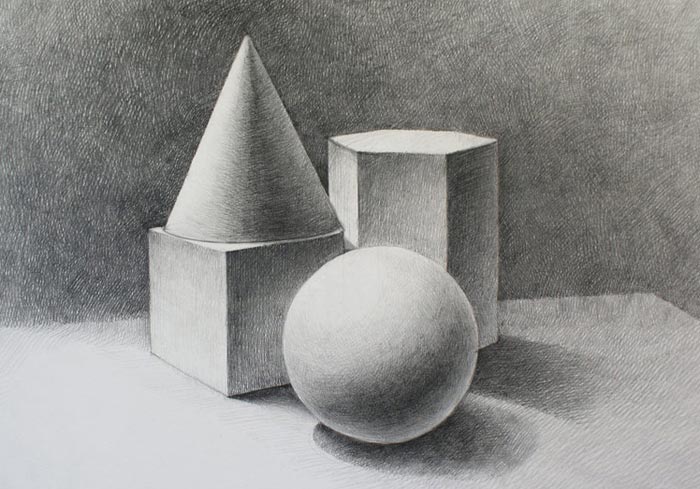
You may find the Drawing Academy tutorials on drawing still-lifes useful to guide you in defining the contours of simple objects. The videos on drawing a human body will show you how this technique can be applied in figurative drawing.
4. Understand the theory of tonal values.
Applying strokes along contours is only good when you have a solid understanding of the theory of tonal values.
Needless to say, when you draw from life, you must constantly compare different tonal values and analyze their relationship on the model as well as in your artwork.
Drawing mostly happens in your head. You need to solve questions about tonal values mentally and put the answer on your paper.
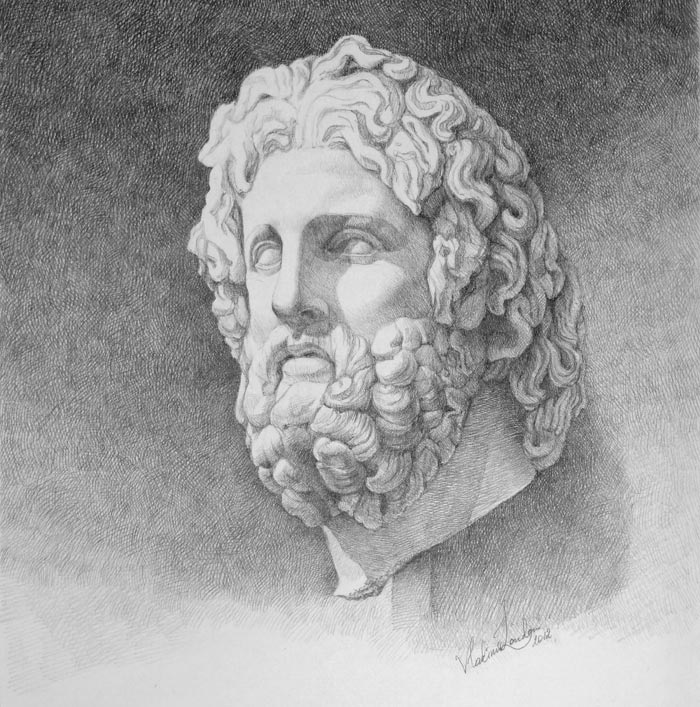
When drawing, ask yourself the following questions: where is the lightest point on a model, and how much lighter is it than the darkest point; where is the border between light and shadow; how much lighter or darker is one area of the subject when compared to another; is there any reflected light that affects the shaded area; can I get render the darkest areas fully with my chosen medium; if I cannot, how much lighter must the light areas in the drawing be to maintain proper proportion; and so on…
Such questions need to run through your head at all times. The moment you stop analyzing, you are no longer drawing, but mindlessly scribbling, which makes your artwork open to all kinds of mistakes.
I believe that your life drawing will benefit from this kind of thoughtful approach. In your drawing, many tones are similar in value, which makes the model flat. Also, I have a feeling that shadow on your model’s arm might be misplaced.
You might want to review the videos that explain lights, mid-tones and shadows, their relationship, ways to depict the full variety of tones, and what questions to ask yourself when analyzing what you draw.
5. Practice shading techniques.
When you are equipped with a full understanding of tonal theory and have sufficient skills to define contours, you need to put your knowledge into practice. Theory alone is not enough; only with practice will you achieve full mastery.
You may want to complement your education with drawings of still-lifes and draperies.
Both subjects are good for detailed study of tonal values and defining contours; not to mention that such ‘models’ are very patient and will hold their poses as long as you need : )
Don’t be discouraged by draperies being “boring”.
Check out what a deep interest artists like Leonardo da Vinci had in this subject.
In the Drawing Academy, you will find the necessary information on and demonstrations of traditional shading techniques.
6. Practice tonal gradations.
It might sound like a silly question, but can you perfectly render all the tones possible in your chosen medium in a smooth gradation?
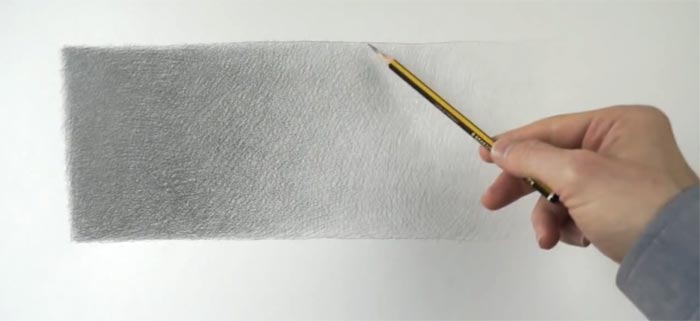
Test your skills by rendering a rectangle of approximates 3 x 12 inches, from the lightest tone to the darkest tone your chosen drawing tool can provide. You might find it beneficial to do such exercises to improve your hatching skills. Practice making beautiful strokes, achieve a wide gamut of marks, and train your hand in various hatching techniques.
7. Learn from the Old Masters.
In the Drawing Academy, we encourage students to study the rich heritage of the Old Masters. Search online, visit museums and galleries, and read books about the traditional art.
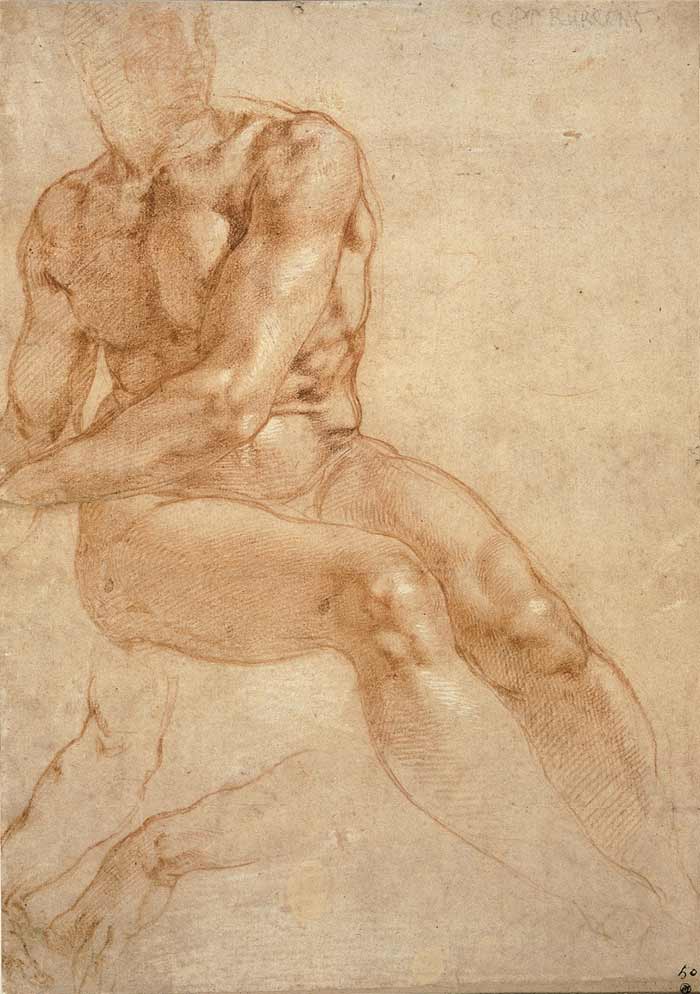
Study carefully how the greatest masters of drawing rendered tonal values, what strokes they used, how they shaded along contours, and what creative and technical tasks they were solving along the way.
By learning from the great, you will have an advantage in achieving better results.
I hope this helps and gives you a clear idea of what to do to improve your shading and life drawing skills.


