Drawing Portraits – Traditional techniques of portrait drawing
In this “Drawing Portraits” video lesson you will discover how to draw a classical female head, classical face proportions, and how to use traditional portrait drawing techniques.
Enroll in the Drawing Academy Course
Pay once - Enjoy forever!
Only $297
Checking Correct Proportions when Drawing Portraits
When you are Drawing Portraits, here is a good tip about how to check if angles of portrait lines were correct. If you take one line for example, and extend this line either on a paper or virtually in your head, you will see in what point it will eventually cross other lines or elements of the drawing. Check if you have the same cross point on the sculpture. You may use a pencil, aligning it to the line in front of the sculpture.
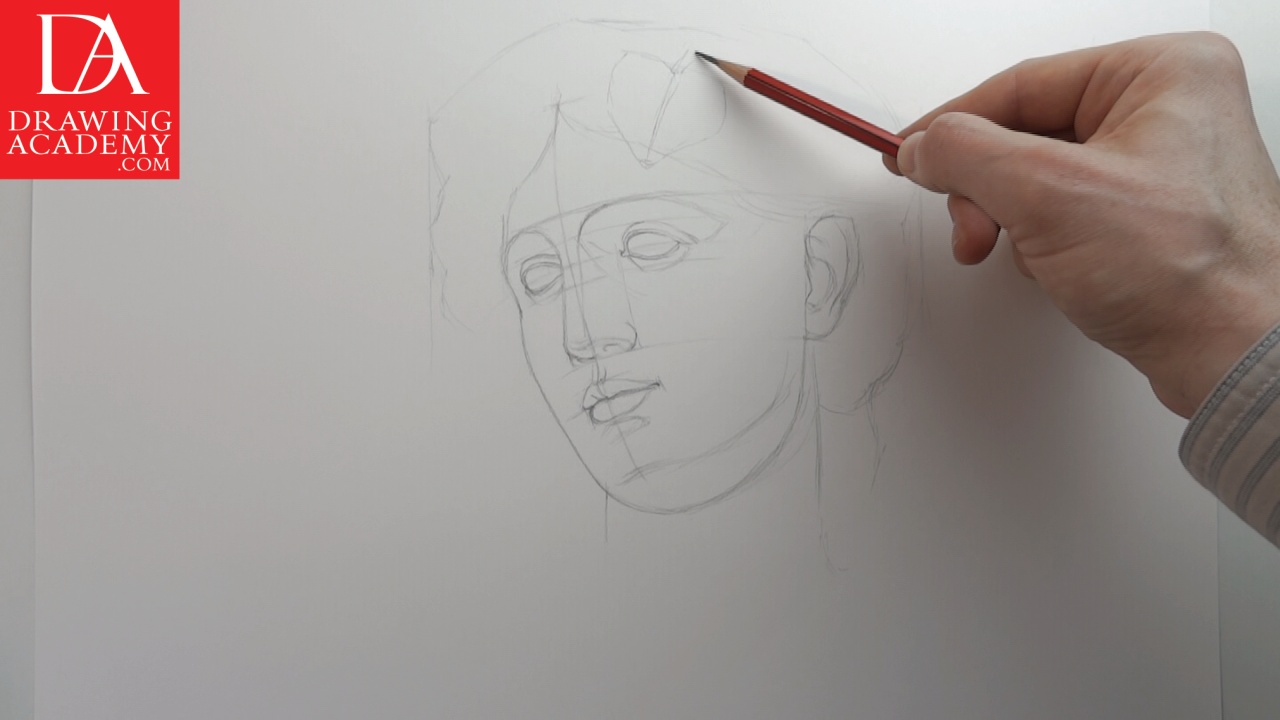
Another thing you should observe while drawing portraits is constantly comparing sizes, shapes and positions of each element in relation to others.
The constructive drawing is done in long lines. At the beginning, I am using a very light pressure on the pencil when drawing portraits. These initial straight lines will be fine-tuned going forward with more details and curves. Also, light lines are easier to erase should I make any mistakes.
Every professional fine artist, when drawing portraits, works from big to small, rather than vice versa. There is a strong logic to it. Imagine, if you start the complex floral decoration drawing every detail as you go alone, you are in danger of losing the big picture and making mistakes in overall proportions. Have you ever had a situation when you do a beautiful drawing in small details and then realise that you have run out of space intended for those details? I certainly made such mistakes before I started learning how to draw professionally.
Drawing Portraits by rendering tonal values in graphite pencil
When it comes to the tonal values of the drawing, I start by indication the darkest shades first while drawing portraits.
There is a common misconception that a graphite drawing must be done in multiple pencils, working from very hard to very soft grades. That is not the case. While such a technique may be used to employ the variety of grades, as a fine art student you will get much more value by practicing to achieve the same variety of tonal gradations using one or two pencils.
When drawing portraits by shading in graphite pencil, I am trying to make every pencil stroke distinct and clear. The way to make shading strokes is to draw a downward line, then lift a pencil and make another one next to the previous one in the same direction. Then repeat the exercise dozens or hundreds of times. The distance between strokes in one group should be kept uniform, as well as the pressure on the pencil.
To darken up the tonal value, shading can be repeated on top of the first layer, but under an angle to the previous one. This will produce a cross hatching effect. Usually the angle is kept anything between 15 to 60 degrees. To darken up shading furthermore, additional layers can be applied. Each layer of hatching can be done under a different angle, so the end result will look more opaque as multiple layers of cross-hatching will cover white paper rather nicely.
A proficient fine artist does not concentrate on one particular area trying to finish it in one go while drawing portraits. Instead, it is better to do short series of hatching of various places of the portrait one after another.
Here is the good test for your process when drawing portraits. If you can stop rendering shades at any given point, and your drawing looks complete and whole, just as if intentionally unfinished, you are doing it in the right way.
Drawing portraits is like developing a back-and-white photograph in the old-fashion way – you place the image into a solution and it starts to darken up slowly; the whole image is becoming more rendered as you continue to develop. None of the area is finished before another. Do you agree that holding a photo-paper at the corner while developing the photo’s one side to the full strength and then changing sides to continue development is not the way to do great looking photograph?
The same logic works for a drawing. It should be rendered step by step, progressively darkening up tone values.
For this drawing, I am using just two pencils. The first one is HB, which has medium softness and therefore covers a wide range of shading values – from very light to quite dark. This HB pencil was also used to make a linear drawing of the female head. Medium hardness grade makes this pencil ideal for making accurate thin lines; this is exactly what was required for an accurate academic drawing.
The second 2B grade pencil is used to make deeper accents in shading. This pencil gives softer and darker lines and needs to be sharpened more often.
With regard to sharpening the pencil, you must always make sure the pencil is sharp to produce perfect lines. If you want to become a professional fine artist, then forget about mechanical or hand sharpeners. These tools are designed for schoolchildren for a safety reason. None of these sharpeners would give you the same pencil cut that can only be achieved by sharpening a pencil with a special pencil knife or a scalpel. Needless to say that your knife or scalpel must be sharp.


