Discover How to Draw a Portrait with Classical Proportions
In this video lesson, you will discover how to draw a portrait using classical drawing techniques.
Enroll in the Drawing Academy Course
Pay once - Enjoy forever!
Only $297
How to Draw a Portrait
This video part of How to Draw a Portrait lesson presents the rules of classical proportions that are used in a portrait drawing.
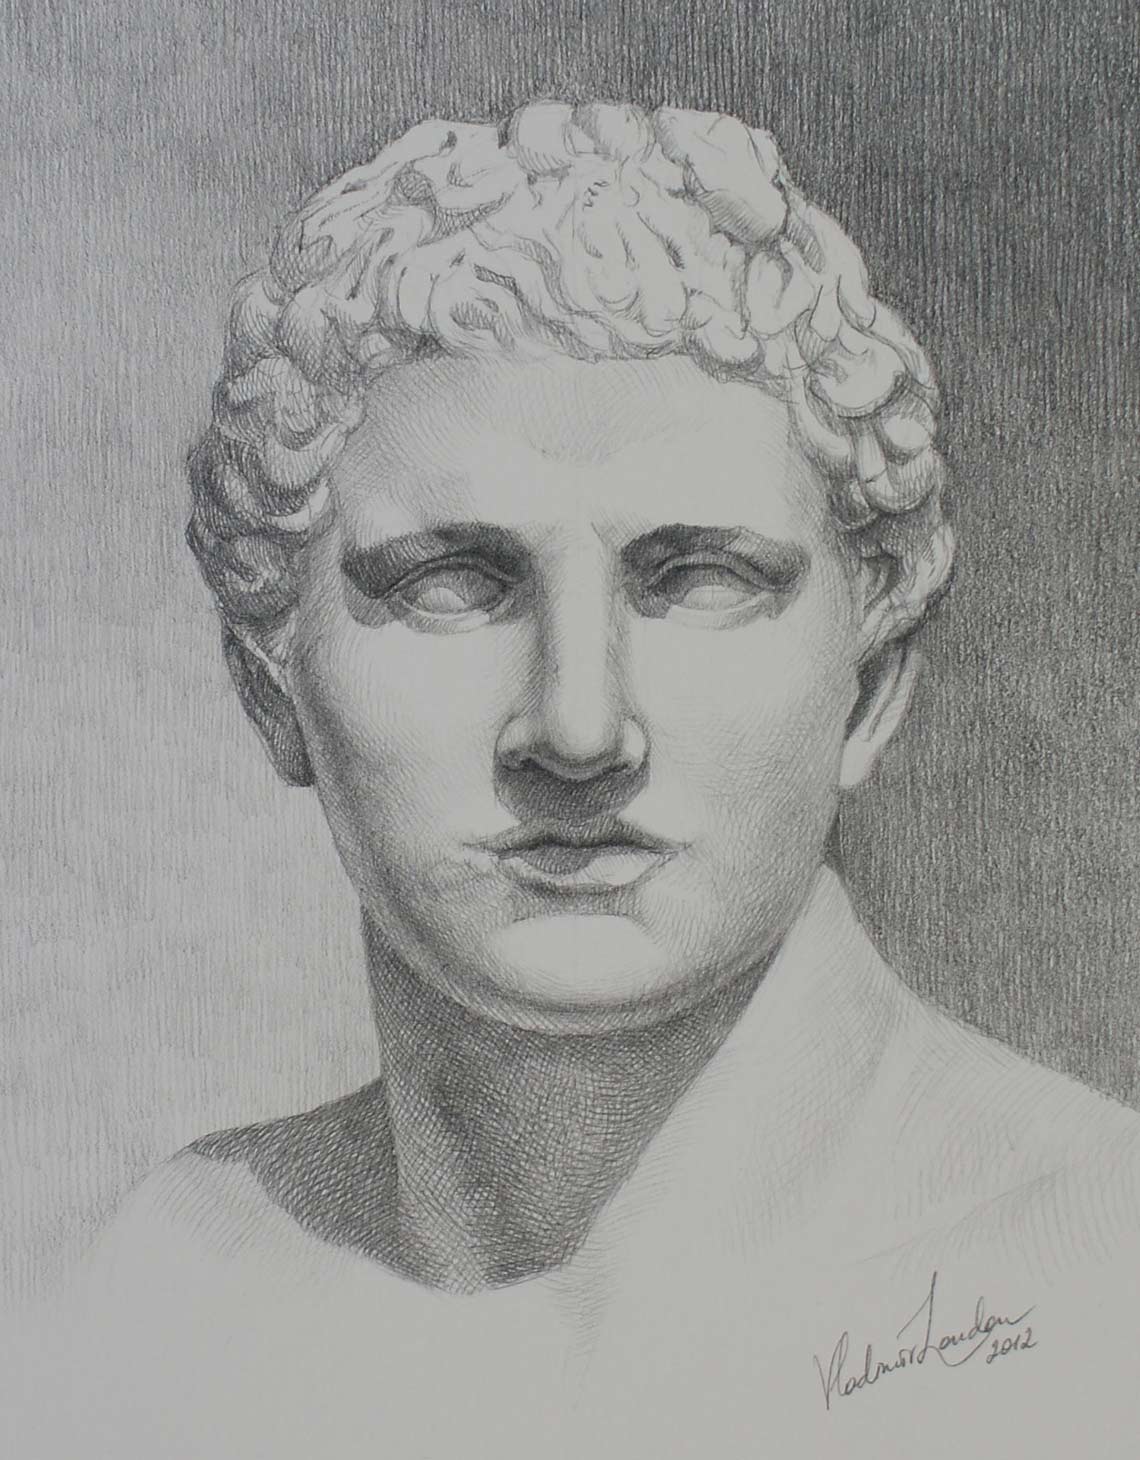
The model is an ancient bust of the hero, Meleager, exhibited in the British Museum, London. In ancient Greek mythology, Meleager was a hero who was involved in the Calydonian boar hunt. He had also traveled with Jason and the Argonauts on the quest for the Golden Fleece.
The full face view is chosen for the purpose of this demonstration of how to draw a portrait to illustrate the face’s proportions.
The full-face head view resembles an oval. The main axes of this oval are two lines – the central vertical line of the face and the horizontal eye-line. From this straight-on point of view, both these lines are straight and go in the middle of the oval.
In this video part of how to draw a portrait you will also see how to use a pencil as a measuring tool to check proportions and angles.
Other important horizontal lines of a human face are: the level of the base of the nose, the hair-roots line, the line of the mouth and the eyebrow’ line.
Classical Portrait Proportions
When you consider how to draw a portrait using classical proportions, keep in mind the following rules.
The length of the eye from its inner to outer corner is equal to the distance between the eyes.
According to the proportions of a face in classical Greek art, the width of the nostrils is equal to the width of the eye and therefore, to the distance between the eyes. To measure these proportions, you can draw thin lines from the inner corners of both eyes down to the nose base. These parallel lines will define the width of the nose.
The mouth barrel, which is described in the Drawing Academy video lesson on how to draw a mouth, is as wide as the centers of the eyes.
When it comes to drawing eyes, you may refer to the Drawing Academy video lesson on how to draw eyes to refresh your knowledge on this subject.
When thinking how to draw a portrait, remember that the upper and lower eyelids of an eye are not symmetrical. The upmost point of the eye’s contour lies one-third from the inner corner of the eye, while the lowest point of the eye’s contour is two-thirds from the same corner.
Eyelids also have a thickness that need to be considered for the correct depiction of the eye.
An eye is essentially a ball; this ball sits inside of the skull’s eye socket and is only partially visible between the eyelids, which envelope it – repeating its spherical shape.
A nose has a characteristic geometrical shape that can be inscribed into a prism. Keep this shape in mind when drawing the nose, it will help you visualize the three-dimensional nature of the nose.
In the Drawing Academy video lesson dedicated to the topic of how to draw a mouth, I have described this process in detail. You may refer to that video to view once again the particular steps to consider.
The upper lip has a similar shape to the “M” character, while the lower lip might look like the “W”. The combination of these shapes is sometimes referred to as a ‘butterfly of a moth’.
The lower lip has a characteristic shape that inscribes two small ovals, as you will see in this video.
In the beginning of the portrait drawing, it is less essential to copy individual characteristics of the face features. It is more important to get the proportions right than worry about the likeness of the individual elements.
You can eliminate the guesswork about the ears’ position on a head by applying the following rule: the lower edge of an ear is on the same level as the base of the nose, while the upper edge of an ear is on the level with the eyebrows.
The outer ear consists of four major parts – helix, antihelix, lobule and tragus. Helix is the outer rim of an ear; while antihelix is the inner rim. The antihelix splits into two arms at its top part, like the character “Y”. These arms are curved forward. Lobule takes one-third of the ear and forms its lower part. Tragus is a small ridge in front of the external opening of the ear canal.
An ear can be visually divided into three equal parts – the upper third is from the top edge of the helix to the place where it merges with the head. The middle third of the ear is circled by the antihelix and the lower third is taken by the lobule.
The hero Meleager’s bust has an athletic neck. To avoid the beginners’ mistake of misplacing the head, neck and shoulder, I would suggest studying the neck’s anatomy. You can check the Drawing Academy video lesson dedicated to this topic.
There is a reason why such details as hairstyle are less important than making sure the head structure is correct and well drawn. Sometimes for a beginner, it is very tempting to go straight into details like: the eyes, nose, mouth, hairstyle, etc. Nevertheless, the classical drawing process requires certain steps to be taken before that.
The likeness of the portrait comes as a sub-product when linear constructive drawing is done correctly.


Comments are closed.