Life Portrait in Red Pencil – Understanding tonal values when Drawing Faces
In this video part of the “Drawing Faces” lesson you will discover how to render tonal values of a portrait in red pencil.
Enroll in the Drawing Academy Course
Pay once - Enjoy forever!
Only $297
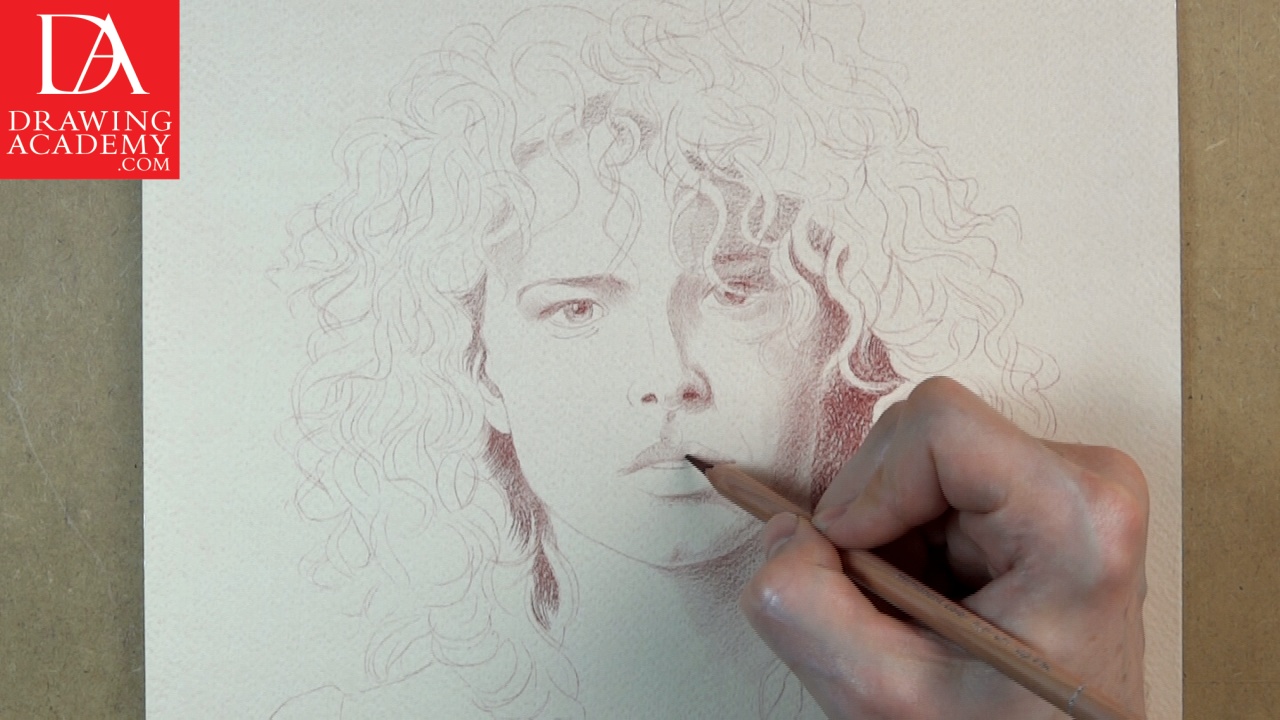
Drawing Faces – Rendering in red pencil
When drawing faces, rendering in colored pencil is essentially the same technique as rendering shades in graphite.
The main rule of shading when drawing faces is that it is better to start from dark places, gradually building their values up.
Various hatching techniques may be employed when drawing faces; for example, making parallel strokes and then working in layers of pencil hatching. Cross-hatching can be used to build up tonal values even more.
Considering how to render shades while drawing faces, keep in mind that direction of strokes has to compliment the shape and form of the depicted object.
Every three-dimensional form can have unlimited amounts of contours and strokes rendered along those contours, which enhance the object’s appearance, creating illusion of reality on a flat surface of drawing.
When drawing faces and attempting to render shades on the drawing, you must first observe and analyze the lights and shades on the model. Establish where the darkest and lightest areas are. This will greatly depend on the light sources. The model can be lit from different directions simultaneously or just from one source of light. The intensity of light will influence the contrast between light and shades on the model. Soft diffused light might provide little contrast; while strong spotlight can give bright light areas and deep shades with little mid-tones.
Another good tip for rendering shades when drawing faces is to first test the maximum value that can be achieved with a particular drawing tool. For example, the red pencil used for this portrait drawing can only give a deep red tone…which is not dark enough compared to the actual shadows on the model. Therefore, a scalable approach needs to be undertaken for this portrait. That means, the darkest shades on the model have to be represented by a lighter in tone rendering in red pencil, and accordingly; lighter shades on the model will be even lighter on the drawing. The main point here is to keep the relationship between rendered shades on the drawing adequate to the ratios of shades on the model.
To keep things simple, you may think of tonal values in three categories:
– the light;
– the mid-tones;
– and dark values.
The area most lit with a light source will have the light values. The area opposite to the source of light will have dark values. Areas in between light and dark will usually have mid-tones.
Three main values of light and shade can be further subdivided into more values. So, the light can be divided into:
– Highlight;
– Light;
– and Local Light.
The Highlight is the lightest spot on an object and is usually located in the closest proximity to the light source.
The Light is a halo around the Highlight. It is brightly lit and surrounds the Highlight.
Local Light is also well-lit but is darker than the Light.
Middle Tone values are:
– Light Halftone;
– Middle Halftone;
– and Dark Halftone.
The Middle Halftone is darker than Light Halftone and in turn, is lighter than Dark Halftone.
Now, we can analyze values of dark tones. The Dark values are:
– Form Shadow;
– Core Shadow;
– and Accent.
The Core Shadow is a place on the object where no direct light reaches and very little reflected light influences its value.
The Form Shadow is lighter than the Core Shadow because reflected light brightens it up. It is still a very dark place on the object.
The Cast Shadow usually starts from the Dark Accent, the darkest spot on the drawing.
When you analyze the model when drawing faces, and decide where the Light, Mid-tones and Dark places are, you can visually subdivide those areas into smaller parts of tonal values. You need to keep in mind the contrast between light and shades as well. For example, the light area can have some smaller details within it that have darker values.
The model’s head is three-dimensional; the only way to portray it realistically on a flat surface of paper is by rendering the chiaroscuro of lights and shades that will appear to the human eye as a realistic representation of the real object.
To make the chiaroscuro rendering work for that purpose, you need to think in terms of masses. Keep in mind that the head is one big mass, including all smaller details and features. This means that hair also belongs to the same mass. The big figure of the model’s head can be mentally subdivided into shapes and planes that form this mass. Observe on the model how light behaves on those planes. Some will be better lit than others and therefore, lighter in tonal values.


