Question from Joey
I have been trying to find an effective way to draw the head, from any angle, in my imagination. One drawing tutor uses a technique in which he adds circles to the side planes of the head and with that, he measures the ears and adds the chin. Can you tell me how the Old Masters addressed this task?
I’m thinking of going to an art college, but not sure which one.
Hi Joey,
Adding circles is just a trick; it does not allow you a deep understanding of constructive drawing principles that are required to draw a human figure or portrait from any angle.
The Old Masters were very good at constructive drawing, perspective, and anatomy. These are “fundamental stones” that proficient drawing is based on. All other “tricks and know-hows” are just bits and pieces that might be sometimes helpful, but will not serve you in every single case.
There is a sequence of steps that proficient artists would take when drawing a portrait constructively:
- Decide on the portrait point of view and angle
- Decide on the paper layout
- Decide on the composition
- Analyze the head’s shapes and proportions
- Mark the overall proportions of the the head/portrait, giving it lead room
- Mark the main masses of the cranium and the facial part
- Mark the connection point of the neck to the shoulders and the head (this includes multiple steps that require good knowledge of human anatomy and constructive drawing principles)
- Mark the central line of symmetry of the head in perspective
- Mark the eyeline in proportion and in perspective
- Mark the lines of the eyebrows, hair roots, base of the nose, and bottom of the chin in proportion and perspective.
Points 5-10 are done after every proportion is measured and analyzed. An artist draws not what one sees, but what one knows. If you don’t know certain proportions, you simply won’t see them on the model. - Necessary planes of the head’s surfaces are marked down with a full understanding of the anatomy of the skull
- Mark the top and bottom edge lines on the ear(s)
- Mark the angled vertical line of the ear(s)
- Mark the position and relative proportions of the eyeballs, nose, and mouth with a full understanding of the anatomy of the head
- Fine-tune details and facial features
- Indicate the main shades and borders between light and dark areas with very light pencil pressure
- Continue tonal rendering in layers, which takes multiple steps as well; there are many rules for rendering tonal values professionally
 The described steps can vary from portrait to portrait, depending on the creative task and personalized approach, but all those steps are relevant both on paper or in the artist’s mind when he or she analyzes forms and proportions.
Skipping or not knowing these rules, principles, proportions, and anatomy will result in the tendency of copying a model, which inevitably leads to drawing mistakes and the portrait becoming less realistic and not looking like the model.
As you can see from the list above, adding circles is an amateur shortcut that won’t get you far. You need to know and practice much more than simplified “tricks.”
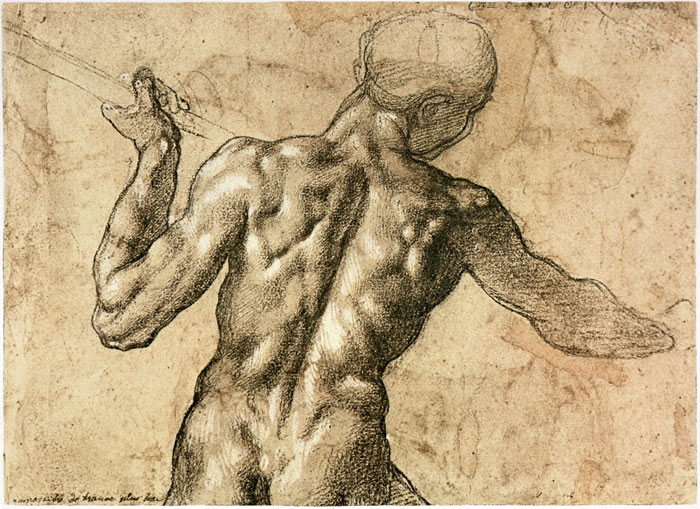
Check portrait drawings by Michelangelo Buonarroti – one of the best artists when it comes to figure drawing. You won’t see any circles but a deep understanding of human anatomy and comprehensive drawing techniques.
To learn proper drawing skills, enroll in the Drawing Academy course »
Also, if you are serious about figurative art, knowledge of human anatomy is a must.
To learn human anatomy fast, visit the Anatomy Master Class »
Regarding your thoughts of going to an art college – be very choosy. A poor selection may waste several years of your life and thousands of dollars just to learn how to “be creative” and “what art is,” instead of actually getting the necessary and practical skills for drawing and painting.
![]() Kind regards,
Kind regards,
Natalie Richy and Vladimir London
Drawing Academy tutors


