In this video, you will see how to make a manga artwork using Huion Kamvas Pro 19 pen-display
Video by Vladimir London
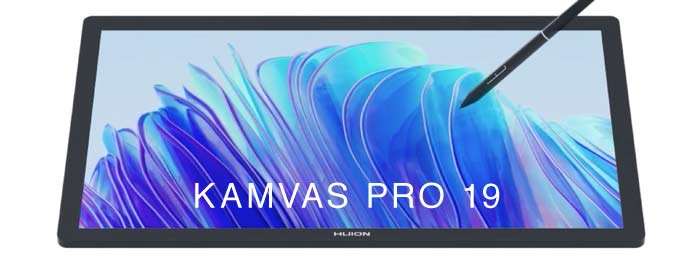
Huion Kamvas Pro 19 – Manga Drawing
Where to get Huion Kamvas Pro 19:
Official Store: https://is.gd/vGv1eS
Amazon (US): https://amzn.to/4aCPIhE
Amazon (UK): https://amzn.to/3XmXSqb
Let’s begin with the equipment. It comes in a well-presented box that says Kamvas Pro 19. The ultra-HD resolution is 4K, and the pen technology is called Pentech 4. On the back of this box, we can learn in more detail about a new and improved generation of pens that use a new chip; it is a promising feature that every digital artist would welcome because precision is important for hand drawing. This product comes with two pens; both pens have eraser buttons. Also, this display supports finger touch, which is a great advantage because you could zoom, pan and rotate canvas with fingers. 4K ultra high-definition resolution makes this display a professional piece of equipment. Another unique point is a second-generation low sparkle anti-glare etched glass. This is a very good feature to have because you don’t want to see any reflections when drawing on this screen. And finally, this display has an amazing color gamut, which is a very important feature for a professional digital drawing equipment. It also says that color was calibrated at the factory, so it is ready for use and colors will satisfy every need.
The box is not too heavy; at the top, there is a handle; so, it’s time to check what is inside. It is good to see that this product is well-protected. The display is in the bag; it is rather light for its size. Talking of its size, it is not too big, but neither too small. It would easily fit in a normal briefcase or backpack. It is slim and portable. I like it already even before I see it. I’ll check the display in a moment. A quick instruction sheet tells what accessories this product comes with; also it gives installation and connection instructions. It is very easy to connect it to computers, laptops, tablets and smartphones. Here’s the driver download link; I will use it later to install this device. There is also information about pens and replaceable pen nibs. This really cool-looking envelope must contain some important information. It says “Calibration report”; let’s check it. Huion really takes care of such details. It is not enough just to tell that calor was calibrated at the factory, but actually give a full report with specification and diagrams. I’m very much impressed with such attention to detail. This manufacturer really takes care of this product. I will keep this report for future reference.
Here’s a very handy device called Huion KeyDial Mini. It is packed in a nice black box. This is a really great gadget that can speed up your workflow. I’m glad that Huion includes it as a part of the bundle, but it is also available to purchase separately here: https://is.gd/LzL2S1
Let’s unpack it. This device has a dial at the top, which can have up to three different functions of your choice. There are also 18 buttons. Each button can be programmed to perform some action or shortcut. At the side, there is the “On” switch and at the top, there is a USB-C port. This device has an inbuilt rechargeable battery; it is very small and light. In the box, there is also a quick start guide with installation and use instructions, which also has a Warranty Card. Also, there is a nicely packed cable with USB-C and USB-A ends. The L-shaped end plugs into the device. Check out the dedicated video on how to use Huion KeyDial Mini and how this gadget will help you with shortcuts and functions:
https://lifedrawing.academy/life-drawing-academy-news/huion-keydial-mini
The next item is a pen box. At the top, this nice-looking box has the Huion logo and two recesses for the pens. At the bottom, there is a small metal hole for pen-nib removal and rubber non-slippery pads. Inside, there are two pens and spare nibs. The slim pen has two buttons on its side and the eraser button at its end. The nib is already installed. Both pens are battery free, which is ideal for hassle-free use. This stylus sits in a hand as a normal writing pen, which many users will find so convenient. Another pen is my favorite. It is thicker and has three buttons on its side. It also comes with the eraser button at its end. The grip side has pleasant-to-touch silicone rubber, which is non-slippery and dust resistant. This pen is ergonomic and easy to hold. There are also ten spare nibs, five plastic and five felt pieces. They will last for a very long time. These pens have a new technology, called PenTech 4. It provides optimised retraction, improved performance and accuracy in all areas of the screen, and tilt auto-alignment, which decreases the cursor offset. With more than 16,000 pressure levels and 60-degree tilt support, these pens are as good as any professional digital artist might wish for. A clever design of this pen box is a nice thing to have. Inside, the inner lining with dust-resistant non-slippery silicone holds pens firmly in place.
The next item is a nice two-finger black glove. It has the Huion logo and is pleasant to touch. What makes this glove very special is its padded side. This is the first time I see such attention to detail in gloves for drawing on screens. Let’s see how it fits. One size fits all hands. It is very comfortable and doesn’t restrict finger movements whatsoever. The padded side is soft; it will cushion the hand support. I really like this accessory. The next item is a cleaning cloth. It is soft and padded; a very useful thing to have especially if you do not use a protective glove.
There are also several cables. Here’s the USB-C cable; its ends are protected with plastic covers. This cable is for connecting a pen-display with a computer, tablet or smartphone. The next USB-C cable is for connecting power to the display. The red end is for plugging into the power adaptor. Here’s an alternative three-in-two cable for connecting the display to a desktop computer. At one end, it has two USB-C plugs; in the middle, two cables split into three. On the other end, there are three plugs, USB-A, USB-C, and HDMI for video. Small clutches would keep cables together if you want. The length of these cables is rather long, which is good because your desktop computer might be located at some distance from the display. The USB-C cables also have a sufficient length of 1.8 meter. The power adapter is small and stylish. It comes with the USA socket plug, but for other sockets, there are special plugs. The adapter has the USB-C socket.
Now, it’s time to check the display. It is in a protective bag. The first impression is very good. The display is stylish, light and thin. It is well-proportioned and has a narrow edge. The etched glass is non-reflective. The 18.4 inch screen has an active area with the 16:9 ratio. It measures 41 by 23 centimetres and has 3840 by 2160 resolution, which is ultra high-definition. With 238 pixels per inch, I doubt you will see individual pixels, which is a great screen to have.
The back casing of this display is made of etched aluminum alloy, which is strong, light and elegant. At the back, there are two foldable supports, they cover the ventilation holes. The small size of these holes tells me that this display doesn’t require extensive ventilation and won’t get overheated, which is important for long hours of work. If you want to mount this display, there are four screw holes for a stand or arm; the distance between them is 75 millimetres, which is standard. At only 2 centimeters thick and 2 kilos in weight, this display is a really great piece of equipment; it is big enough for drawing, yet small and light to be portable.
Two resets at both sides make it easier to handle. On one side, there are two USB-C ports and one standard audio jack. Also, at the bottom, there are two rubber pads for non-slippery support. They are small yet grippy. At the top, there is the power button, light indicator and the finger-touch switch. These buttons are metal, discrete and stylish. The display stands firmly on the desktop.
Before testing this display in action, I need to install its driver; it is available from the Huion website. Just click the “Download Center” button, select your device and operating system. This pen-display is compatible with Windows, Mac and Linux. Also, you may want to download the User Manual. This Manual comes in different languages and contains all the information you may need to know on what it is about and how to use it. Installing a driver is a straight-forward process. Just download the file, run it and follow the instructions. You may also refer to the User Manual if you have any questions about installation. It makes sense to save this Manual for future use.
With the driver installed, I can now do some settings. The plugged-in display name will be displayed at the bottom. The working area tab allows you to select a preferred option. I want to see the full area; however, it could be set to a screen ratio or custom area. There is also the possibility to rotate the screen at 90-degree angles. You can also calibrate the monitor.
To set up your digital pen, you need to know which actions you want to have. Every drawing software comes with a set of shortcuts. Such shortcuts can be found in Preferences. For example, in Rebelle, it is under the “Keyboard” tab. Here, you could see a very extensive list of different key combinations for different functions. If you are a professional digital artist or designer, I’m sure you already know and extensively use numerous keyboard shortcuts. With Huion devices, you can assign such shortcuts to the KeyDial Mini as well as to the digital pen. It makes sense to search for the most used key-combinations and write them down just in case. Coming back to the Huion driver interface, under the “Digital Pen” tab, you will see two pens for this display. Rolling over the pen’s buttons, you can check the default generic settings. Every program you use may have its special set up. Just click the “Add a program” button and select the program you want to use. It has to run on your computer to be in the list. So, I will go for Rebelle. For this drawing program, I will set up the “Quick Menu” button. You can assign a different function if you wish. The Quick Menu comes with six virtual buttons. I want two buttons to perform Undo and Redo functions. You can manually type the function name to be displayed. Another important action is to save files. And I will also set up two buttons for zooming in and out. One button is for the actual view at 100%; and another button will make the drawing area to fit the screen’ I name it “Fit” to be short. You may want to set up the slim pen as well.
The top-right “Settings” button opens a screen with Display Settings. Here, you can adjust brightness and set up the color setting, which I prefer to be sRGB because it fits most of my needs. You can also enable or disable finger touch functionality. In the Backup tab, you can export your current setting for future use. Which can be done by importing them on another device or if you accidentally reset everything to the default settings. The general tab allows you to pick the color scheme and select the interface language.
Another function I want to set up for the pen button is Rebelle brush adjustment. The shortcut is simple, yet this functionality will be very much helpful when I will draw on the display. With all three buttons ready for action, I will now test this pen in the Rebelle program. The first button is for adjusting brush size and opacity. By pressing this button and moving the pen up and down, I can increase and decrease the opacity of a chosen brush. Also, by moving the pen horizontally to the right and left, I make the brush size bigger and smaller. It’s very convenient to do it with one hand instead of using a keyboard shortcut for that purpose. Here’s the brush size in action – I can easily change it by pushing the button with one finger. The top button brings the Quick Menu options where I can undo pen strokes, for example. The same way, it is easy to redo those actions one by one. Once again, all is done with the pen without a keyboard. The same Quick Menu also has options to display the drawing area at the full zoom and to fit the screen. A can also save the file with this pen, which is really good. Just to remind you that you could set up whatever functions you like instead of those I’m showing here. This is down to your personal preferences. Anyway, if you want some good tips, I think the ability to adjust brush size and opacity will serve you well in digital drawing. The quick menu on the pen is good, but at the same time, Huion KeyDial Mini can do the same functions even faster.
It’s time to show you how I did this manga artwork on the Huion Kamvas Pro 19 pen-display.
I will start with the face drawing. To get some proportions in place, I will make an underdrawing, which will serve as a guide for final contours and outlines. The manga stylisation has its rules. A character’s head is usually shaped as a hazelnut. The vertical line of the face symmetry is a good guide to position the facial features correctly. I will also mark several levels that will help to avoid horizontal misplacements. The height of a face is divided into three parts by these levels. The outline of the jaw gives the three-quarters view angle. According to the classical canon of proportions, the top edge of an ear is located at the eyebrows level while the bottom edge is aligned horizontally with the base of a nose. So the height of an ear is comparable to the height of a nose. There are certain rules of how to draw an ear, which are based on anatomy of its cartilages. These rules are fully explained in the Life Drawing Academy course. I will also mark some helping lines for eyes, nose and mouth. How to draw a portrait in the three-quarters view is described and illustrated step by step in my book, which is available on Amazon.
The classical proportions of a realistic face are adapted a bit for the manga style purpose. The eyes will be bigger, the mouth is smaller, so is the lower third of the face. When you know how to draw realistic portraits from life and imagination, adapting those rules for some chosen style like manga or anime is easy. The three-dimensional construction, anatomy and proportions will remain in place, but simplified and amended to serve the style purpose. However, if you do not know those rules, making manga or anime characters will be more difficult for you. Also, your drawings will have inevitable mistakes you won’t be even aware about. This is because a proficient artist draws what one knows, not what one sees. This is especially important when you design fictional characters that you could not meet in life. If you want to get strong figure and portrait drawing skills, take one of the best drawing courses – Life Drawing Academy.
With the disposable construction lines in place, I can now outline facial features in darker lines. The vertical line of the face helps to make such features symmetrical while horizontal lines ensure that paired facial features are on the same level. While I’m drawing, I will give you some tips on portrait drawing. When drawing an eye, keep in mind its shape, which is a sphere. The distance between eyes can be compared to the width of one eye. The eyelids have thickness and envelop the eyeball. The upper and lower eyelids are not symmetrical. The top point of the upper eyelid is about one-third from the inner corner, while the bottom point of the lower eyelid is one third from the lateral corner. The upper eyelid is a bit bigger than the lower and has more eyelashes. Unless you draw a girl’s portrait, do not depict individual eyelashes, but make one bold line to unite them. This rule is not applicable for female manga faces. The width of a nose is comparable to the distance between eyes. The bottom edge of the lower lip usually divides the distance from the base of the nose to the bottom of the chin in half. The upper lip edges divide the upper half into three almost equal parts.
When it comes to a hairstyle, the manga portrait rules are also a bit different from a realistic portrait, but the same logic is applicable here anyway. Think about the hairstyle as one big unified mass that has a thickness and envelops the cranium shape. For anime, hairstyles are usually more simplified and stylized than in manga artworks because such drawings have to be animated. The same approach is used for noses. For anime, a nose would be just a simple line with a bit of shadow, while in manga it might look more realistic, with nose wings and nostrils, like in this drawing. If I make a mistake, it is easy to correct it with the Huion pen. I just press the Quick Menu button and choose “undo”. I will exaggerate the hairstyle in this drawing to get a bigger dark mass on the light background. The coloring will come later, but I already plan the tonal masses and the balance between dark and light areas.
To connect the head to the torso, I need the neck cylinder. The bottom plane of this cylinder, where it connects to the shoulders, is not horizontal, but tilted. The pit of the neck is lower than the seventh neck vertebra. The oval at the bottom of the neck marks the dimension of the first pair of ribs. How to draw a shoulder girdle is an important topic that many beginner artists are not aware about. This topic, together with anatomy for artists and sequential steps of portrait drawing is fully covered in the Life Drawing Academy course. Actually, students who receive unlimited personal tutoring in this course make and draw special models of a skull and shoulder girdle to learn the head and shoulders construction. Such practical tasks prepare them for drawing portraits from life and imagination.
The background will be light in tone and warm in color. I will randomly sketch some leaves and flowers on top of the big round shape overlaid with arches design elements. I think such a background is more than enough to test how Huion Kamvas Pro 19 pen-display works for digital drawing.
With the drawing complete, I can now paint in colors. I will start from the background, then do the face and hairstyle and finish with the dress and final touches. This sequence can be arranged in any way you like, there are no hard rules here. By now, I can already tell that Huion Kamvas Pro 19 pen-display is a great piece of drawing equipment. Its size is not too small nor big, just right for such design and illustration work. All the necessary tools and windows of the Rebelle painting program are arranged on both sides of the drawing area while there is plenty of room left for the artwork itself. This drawing approximately measures as an A4 size sheet of paper, which is bigger than what you get on most tablets. The 4K resolution on such a large screen looks really good. I do not see individual pixels, the colors are bright and the color gamut is wide. This is very important for a digital artist, illustrator or designer. I also like the pen. It is very precise and easy to draw with. There is no parallax effect no matter at which side of the screen I draw. I think screen calibration also helped to minimise such an effect. In addition, I really like the three-button functionality of the pen. Three buttons actually provide 8 functions, which is sufficient for most users. And, of course, should you need more shortcuts, Huion KeyDial Mini will give all the functionality you want to have. This device is included in the bundle.
The manga artwork is progressing nicely. By the way, character design is one of the topics covered in the Life Drawing Academy Correspondence Course.


