Question from Raise
I need some advice on hatching.
I don’t know how to get a gradient tone. How do I show the difference between dark, light, and mid-tone values by varying strokes?
How do I hatch depending on the shape of an object?
Thank you
Hi Raise,
Many thanks for your questions.
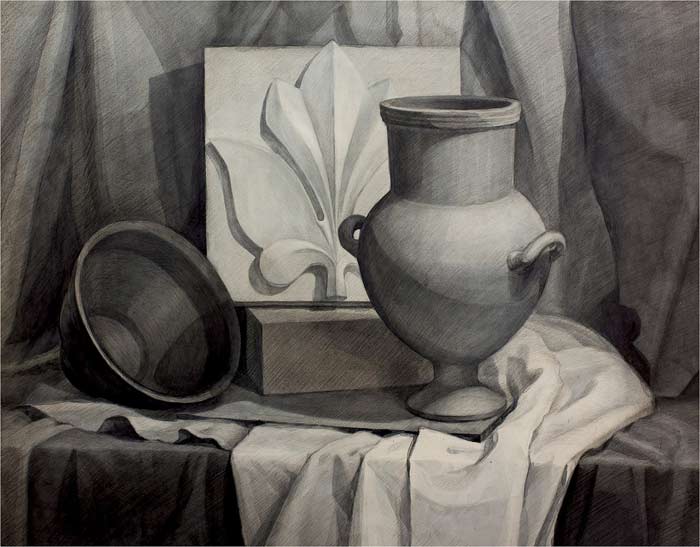
There’s no one quick trick to get a good style of pencil strokes. However, there is a chain of simple exercises that you can practice to improve pencil hatching.
Here’s what you can do:
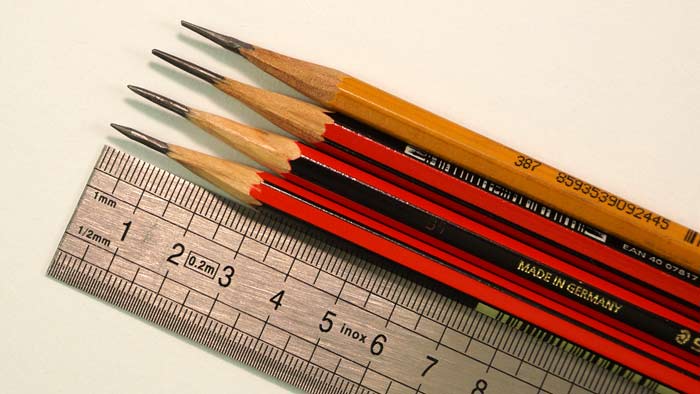
1. Take an HB pencil and sharpen it so that at least 1cm of the lead is exposed.
2. When a pencil gets shorter, use a pencil extender. Hold a pencil closer to its end, not the tip.
3. Use at least A3 – or, better, A2 – drawing paper with fine tooth.
4. Fix the paper to a vertical drawing board.
5. Sit or stand in front of the board at arm’s length. After a while, you might get a temporary pain in the front portion of the Deltoid muscle if it’s underdeveloped. That’s normal.
6. Draw lines in various directions using a candle grip.
7. Keep the length of lines between 5 and 20cm.
8. Draw parallel lines with a 2- to 4-mm gap between them.
9. When a pencil gets blunt, re-sharpen it. You can sharpen several pencils at a time to save time.
10. Do lines with various pressure on a pencil. Start with very faint lines. Slightly increase the pressure after every 100 strokes or so.
11. Learn the limit a pencil can give in terms of pressure and tone. Stay with HB grade. It is not about the tone but your pencil-handling skills.
12. Draw lines with various curvatures.
13. Draw lines with various pressures – start with a line light, press harder in the middle and end light.
14. Lift the pencil from the paper after every single stroke.
15. Spend half an hour every day for three weeks just drawing random lines. This would be a good start, although 10 hours is not enough to master lines.
16. Do cross-hatching at 30- to 45-degree angles.
17. Draw big rectangles and fill them with multiple layers of hatching, making gradients. The light side might have one or two layers of very faint lines. The dark side can have anything above 20 to 50 layers.
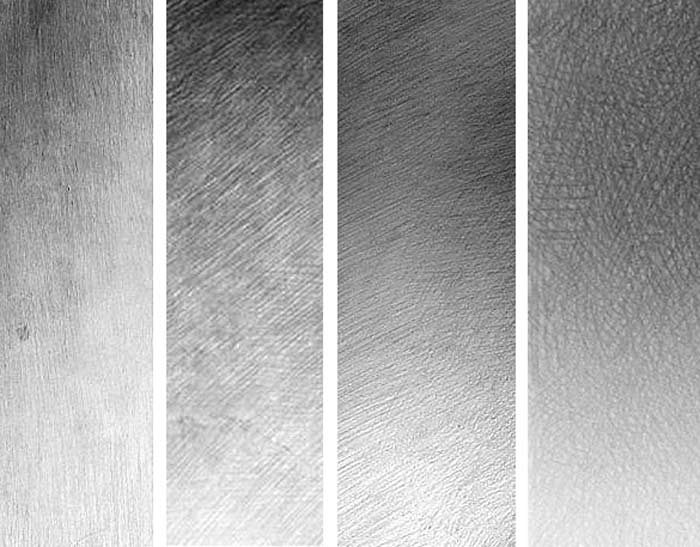
18. Do not do sharp borders between layers; this will give a smooth gradation of tones. Do not smudge graphite marks with a stump or finger.
19. When you get used to the candle grip, do more challenging tasks – draw cubes in perspective from life for at least 40 hours. You can make a cube with a 20cm side from paper.
20. Use constructive drawing principles for drawing from life. Measure angles and proportions with a pencil. Draw a cube as if it were transparent.
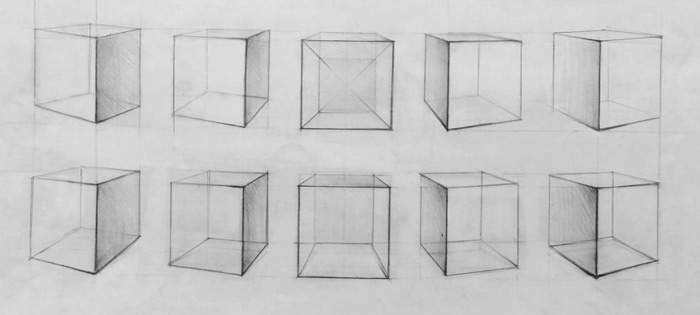
There are several tasks here – handling a pencil, learning constructive drawing principles, learning how to measure with a pencil and, above all, getting a good “feeling” of perspective.
21. Draw plain cubes and render tonal values. Lines should be straight but applied at different angles. Learn what aerial perspective is and how to achieve it in drawing.
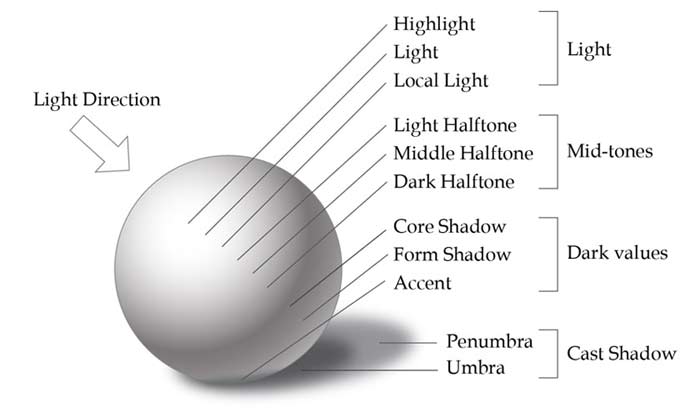
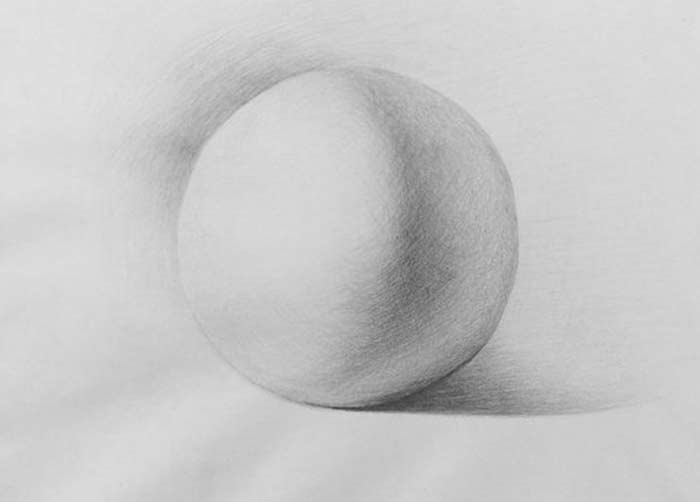
22. Learn how to shade spheres with the necessary knowledge of tonal values.
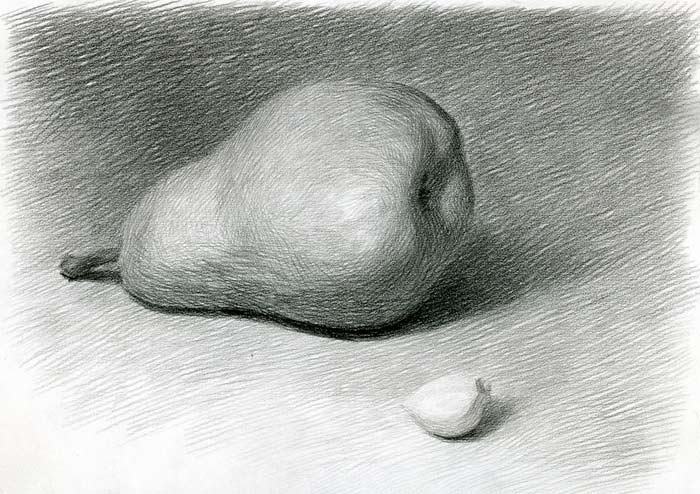
23. Draw organic and manmade geometric objects from life.
24. Learn what contours are and how to see them and mark in drawing.
25. Draw still-lifes from life.
26. Practice applying shading lines along contours. It will take a year or so until you develop the habit of rendering tones along contours without thinking about it.
27. With regular practice, you should get to the point where a pencil is not a tool in your hand but a continuation of your mind.
Now you know what to do. The rest depends only on yourself.
Kind regards,
Vladimir


Dear Vladimir, thank you so much for your such detailed answer. I really appreciate your help!
Thank you, Rase. I’m glad you found it helpful.
Best regards,
Vladimir
I had a feeling that there is much more to pencil hatching than my art college teachers told me. I could only wish they would be as professional as the drawing academy tutors. Thanks a million for sharing your knowledge. Please keep going; I’m reading every email you sent and every article you write. There’s so much to learn from you
Loren,
Thank you very much for your kind words, they mean a lot to us.
Kind regards,
Vladimir London
Drawing Academy tutor
Hi Vladimir,
In your answer to Raise, as point # 26, your advice to her is: “Practice applying shading lines along contours.” I do not understand the expression: “shading lines”. Are they inside or outside of the contour line? How much darker could they be than the contour line?
Thank you for your help
Hi Yudit Maria,
Many thanks for your question.
I think you are confusing “contours” with “outlines”.
An object usually has only one visible online, but indefinite contours.
A contour is a virtual line that can be obtained by dissecting an object with a virtual plane at any angle and in any place.
If you take an apple and slice it with a knife at any angle, cutting lines will be contours. Every such line describes the apple’s three-dimensional shape. That is why hatching lines along contours reveals an object’s shape.
You can learn more about contours in this video lesson (Chapter 10 – “Define the contours of geometric and organic objects”)
https://drawingacademy.com/help-i-cant-draw
I hope this helps.
Best regards,
Vladimir
I always dependent on the grades(tones) of the pencil than the pencil handling techniques.
Thanks to help me know the difference.
Almost all of my questions to the drawing basics are handled with this answer here
in a very comprehensive manner.
Thanks for detailed answer and therefore thanks also to Raise for asking!
Behind every skill lies hard work, hard work, and more hard work.
Thank you for such practical advice.
Detrás de toda destreza, TRABAJO, TRABAJO y TRABAJO bien orientado.
Gracias por tan prácticos consejos.