How to Draw Faces by Portraying Tonal Values
In this video part of “How to Draw Faces” lesson you will discover in depth information on the values of light, middle and dark tones.
Enroll in the Drawing Academy Course
Pay once - Enjoy forever!
Only $297
How to Draw Faces
When considering how to draw faces by rendering tonal values of light and shade, a fine artist must observe the direction of light. The area of this marble head which is the closest to the light source will be the lightest. Its tonal value is called, the highlight. This spot or spots on the drawing need to be left un-rendered – so the natural colour of the white paper will serve as the highlight.
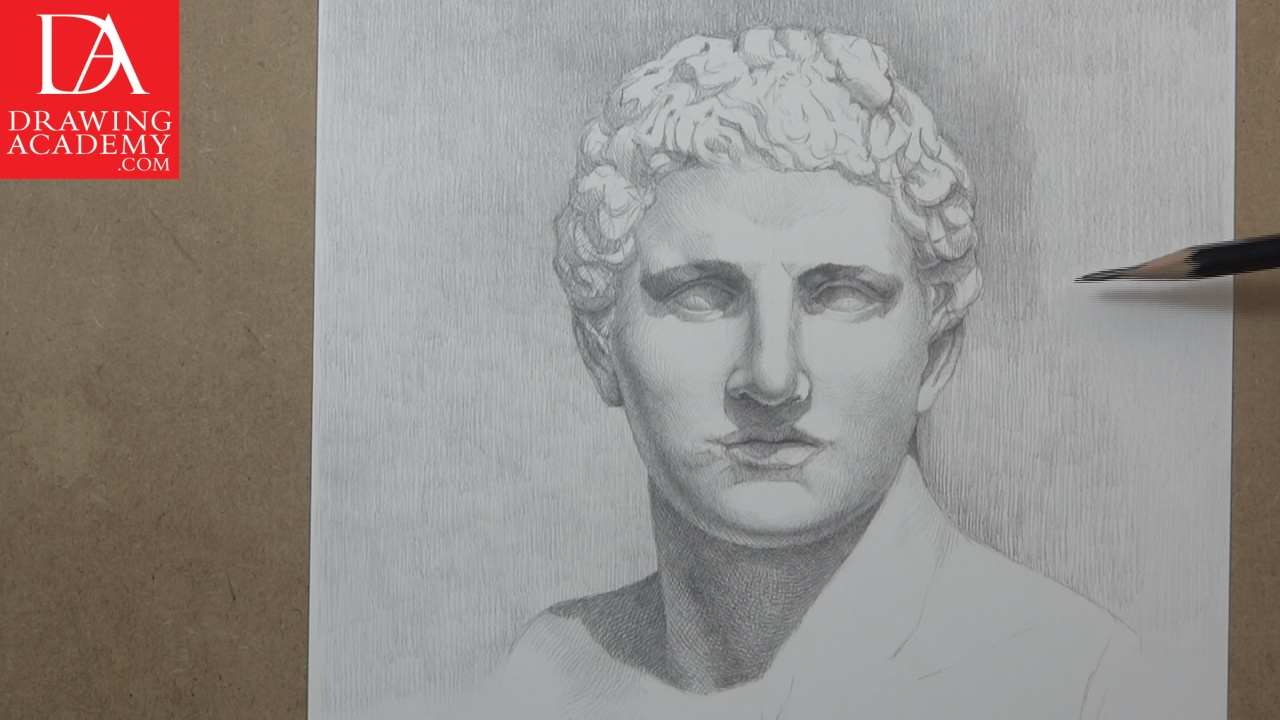
The areas around the highlight are light. A very light rendering is required here. Such areas can be left un-rendered until the very end.
The next tonal value is the local light or local value. It is the darkest tone of the light area. After which the light halftone follows.
The light halftone is very close in tonal value to the local light; however, it is fractionally darker.
Light halftone changes by the middle halftone, which is followed by the dark halftone. Very often the dark halftone has the same value as the reflected light.
The core shadow usually follows the dark halftone. This area is affected very little by the light from the light source and by the reflected light and therefore, is quite dark.
The form shadow has even less light reached from the light source; however, it is brightened by the reflected light and that is why it is slightly lighter than the core shadow.
The darkest spots on the drawing are dark accents. These parts of the cast shadows have very little reflected light coming from other surfaces and of course, they have no light coming directly from the light source.
When it comes to the topic of how to draw faces, keep in mind that classical lightning is when the source of light is coming from the top-left corner. When you can direct how the light can be arranged, take this approach as a rule of thumb: it is better to have artificial light for a long term marble-head drawing than natural light. Natural light will change its direction and strength, while artificial lightning is easy to control.
In this video lesson on how to draw faces you will also see a variety of different pencil hatching methods.
I will demonstrate how to hold a pencil in the correct way when using different rendering methods.
Here’s a short summary of tonal values rendering steps used in this drawing lesson on how to draw faces:
– The illusion of a three-dimensional look of this marble head is depicted by means of rendering tonal gradations of this portrait.
– We started rendering in HB graphite pencil – applying very little pressure on the pencil.
– The sequence of shading was progressing from dark areas to lighter ones.
– The objective of the initial shading was to decide on the light and dark parts of the drawing.
– All shades were depicted in relation to each other. I was constantly comparing the tonal values to keep the correct tonal balance.
– As a rough separation between light and shade, three main values were focused on: the light, mid-tones and shadows.
– This tonal balance gradually increased in value. The shadows and mid-tones were steadily becoming darker. We didn’t render the highlight and lights at that step.
– Cast shadows are an important part of this portrait. We paid attention to accents, which are the darkest spots on this artwork.
– The progression of shading was going from big common masses to smaller details.
– The main tonal values were sub-divided into tonal steps. For example, the light was divided onto the highlight, light and the local light. The mid-tones were divided into light halftones, middle halftone and dark halftones. Last, shadows were divided into form shadow, core shadow and dark shadow including accent of the cast shadow.
– These tonal values have no well-defined boundaries between each other, as one tone seamlessly goes into another.
– Working on classical antique marble is a great way to learn skills necessary for how to draw faces topic.


