Drawings by Aarti
Hello,
Here are my still life drawings for your feedback and guidance.
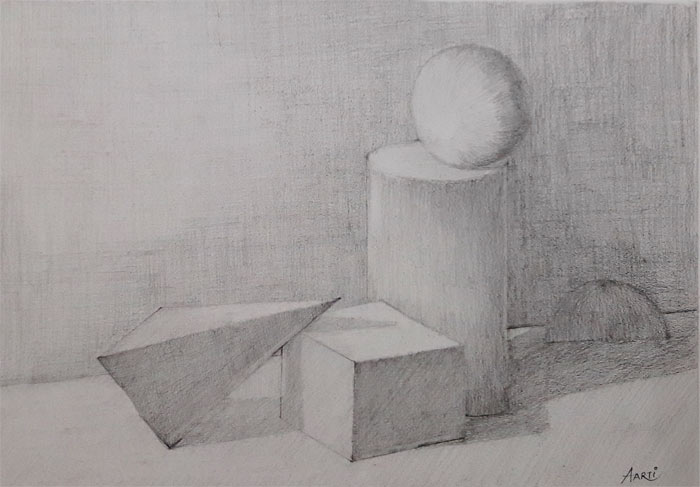
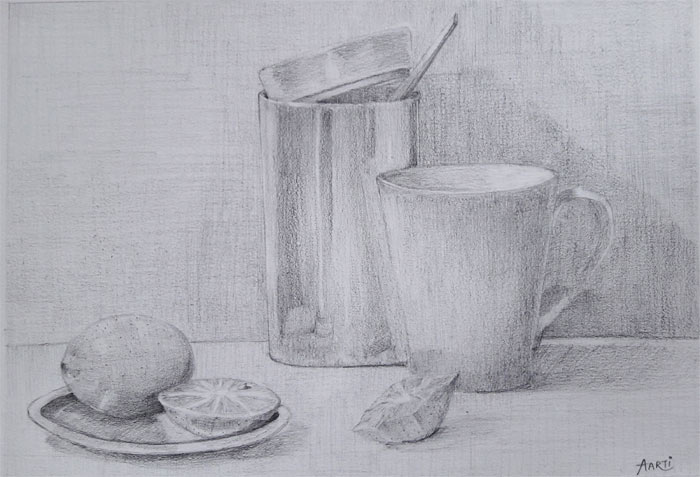
Dear Aarti,
Many thanks for your still-life drawings. I like your artworks, great job!
It is good that you draw geometrical objects. This way, you will improve your skills of drawing in perspective and learn more about constructive drawing principles.
There are few things that can be improved in your artworks.
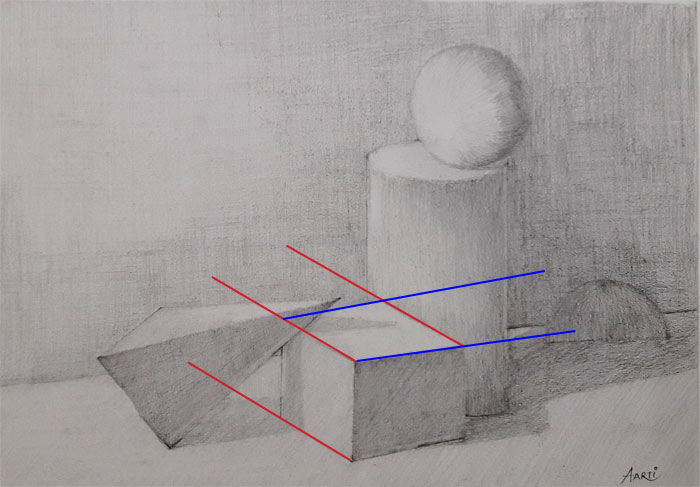
A two-point perspective would describe the best a cuboid in your drawing; instead, one half of this object is depicted in parallel perspective (red lines) and other half in reverse perspective (blue lines).
Here’s an example how a cube could look from this point of view. This exercise also gives us the Horizon level.
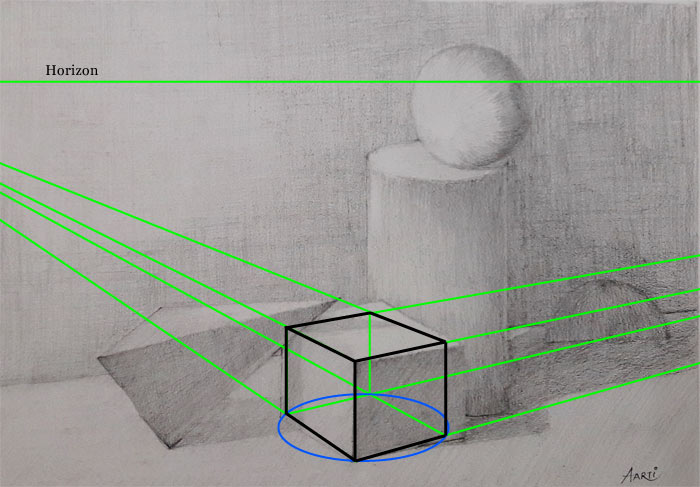
A blue oval inscribes the bottom plane of the cube. This oval will become handy for judging perspective of a cylinder.
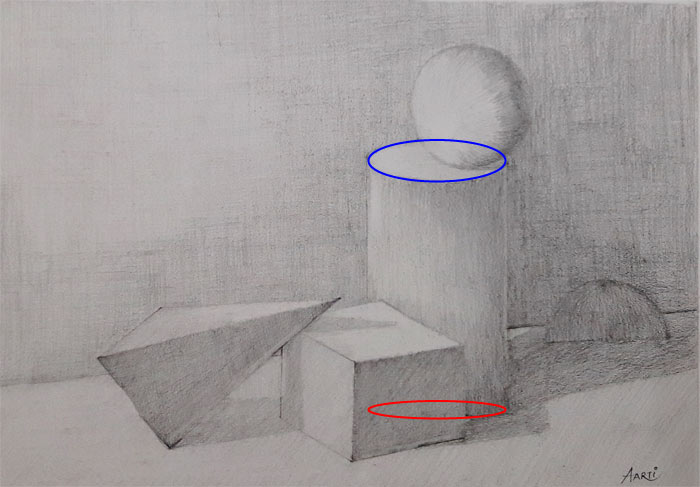
In your drawing, the cylinder is depicted in reverse perspective. The oval at the top (marked in blue) is fuller than the bottom one (red oval).
Using the horizon level and the oval that inscribes the cube’s bottom plane, we can construct a cylinder with confidence in one-point perspective. The bottom plane of the cylinder is located very close to the bottom plane of the cube and therefore their ovals would have similar proportions.
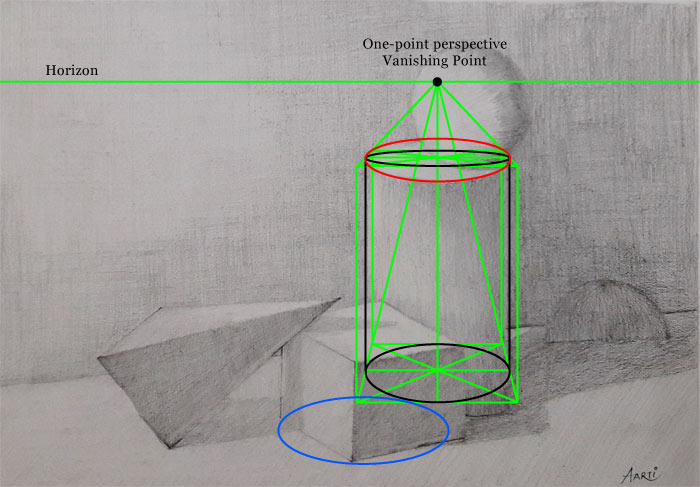
Building a cuboid that contains a cylinder inside, we can determine the cylinder’s top oval, which is seen close to the horizon and therefore will appear quite slim. It is almost three times slimmer than in your drawing – compare black and red lines.
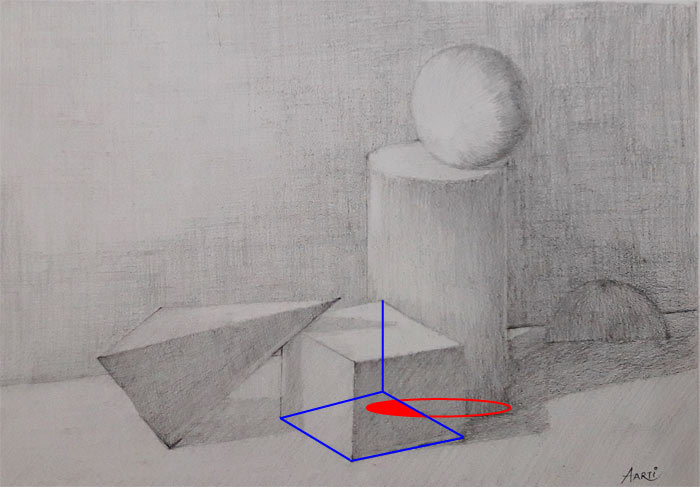
Another thing to keep an eye on is the spatial relationship between objects. In your drawing, the cylinder and the cuboid are intersecting each other (red area).
When it comes to tonal rendering, get a good habit of hatching with a well-sharpened pencil. 2B is good and sufficient to achieve necessary contrasts between light and shade.
Also, cross-hatching at the right angle is more suitable for depicting cloth, but not so for general backgrounds. Try using cross- hatching at 30…60 degree angles.
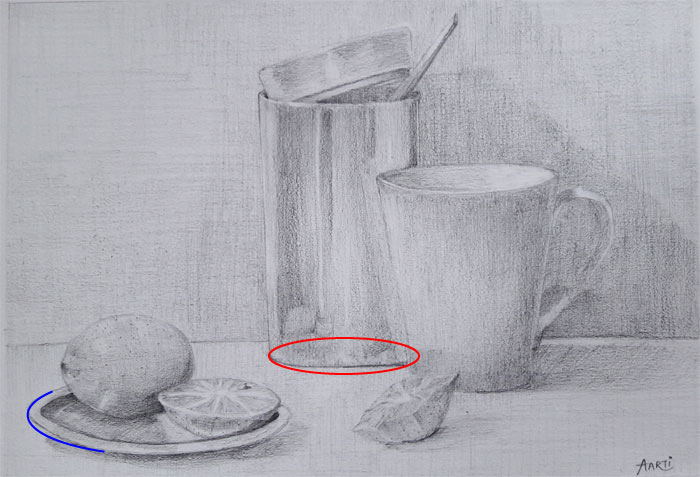
Your second still-life also have mistakes with ovals.
Here’s one good exercise you can do to improve your perspective drawing skills. Download a template below and make a cube with inscribed circles from paper; draw it from various angles from life.
Measure proportions and perspective angles by eye and double-check those dimensions with a pencil.
How to use a pencil to measure proportions, cross-sections and angles is described here:
//drawingacademy.com/how-to-measure-with-a-pencil
//drawingacademy.com/how-do-we-measure-with-a-pencil
Once again, thank you for wonderful your drawings.
To your creative success,
Vladimir London
To learn professional drawing techniques,
Enroll in the Drawing Academy Course
Pay once - Enjoy forever!
Only $297


Many students forget to keep in mind that, as we reach the eye level, the oval shapes start getting smaller and they will become a straight line at the eye level.
And one should never forget about vanishing points.
Very helpful critique!!!
This is a clear and useful explanation and indication of very common mistakes in drawing circles and spatial relationship between the objects. Later would probably not happen if constructive drawing was used.
Illustrated in this way learning through understanding of mistakes is much more precise.
Your ability to explain complex ideas in a simple and concise manner is remarkable. Thank you for this informative post.