Anatomy in Art – Making a portrait with the knowledge of human head anatomy
Video Lesson Description
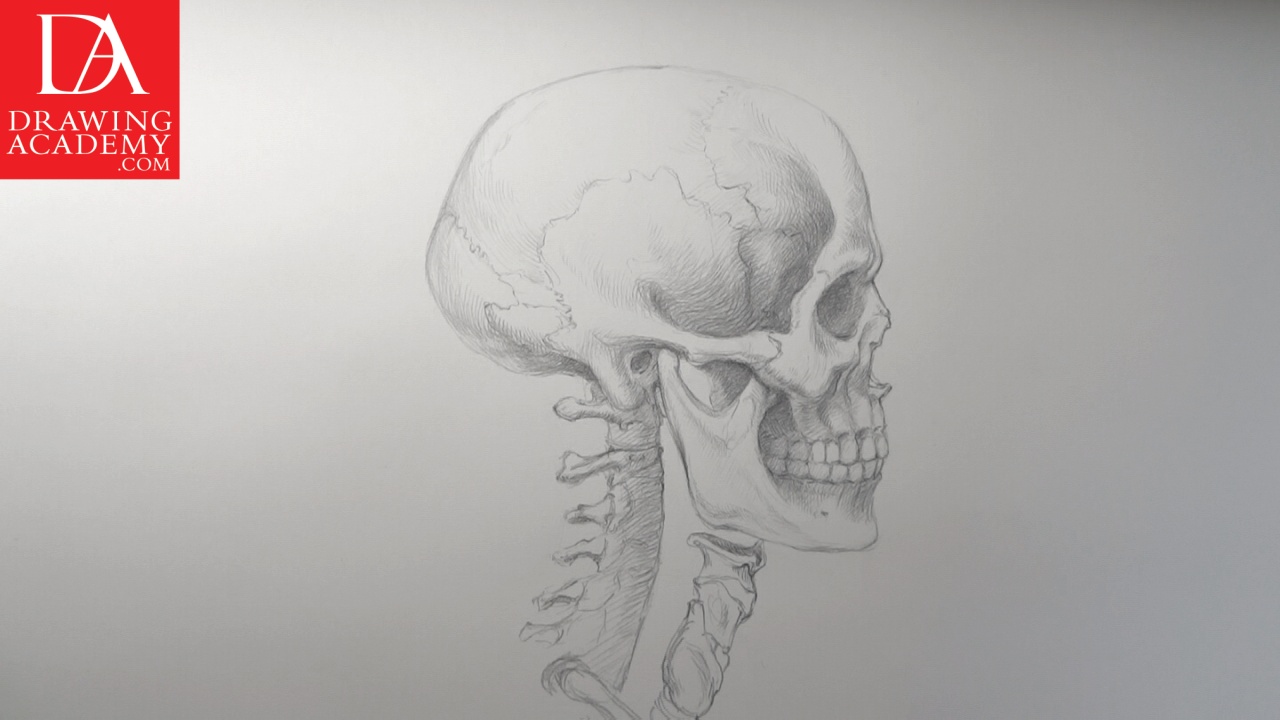
In this video part, you will discover the Anatomy in Art on example of how the drawing of a head correlates in relation to the bones of the skull and its muscle anatomy.

Anatomy in Art
The placement of the lips, the nose wing and the brow line is following the Anatomy in Art rule of the “thirds”. According to this Anatomy in Art rule, the face can be divided into three equal parts, called the “thirds of the head”. These thirds are as follows:
– First third is the distance from the chin-line to the nose-line. The chin-line corresponds to the under-plane of the lower jaw and the nose-line aligns with the bottom of the nose.
– Second third is equal to the first one and goes from the nose-line to the brow-line, which is the top border of the brow ridge or the eyebrows.
– The third portion is equal to the first and second parts and goes from the brow-line to the hairline or approximately where the frontalis muscles begin.
The second third of the face also indicates the ear’s position on the head. The brow-line and the nose-line can be extended horizontally to the ear region. These two lines will be the top and bottom borders corresponding with the ear’s outline, so the ear will be placed between these two lines according to the Anatomy in Art.
Note how the ear canal is positioned on top of the external auditory meatus of the skull. As you may remember from the first part of this Anatomy in Art video lesson, this is the opening on the skull, which goes into the inner ear.
The orbicularis oculi muscle goes around the eye. The orbital portion of this muscle is attached around the eye socket, while the palpebral portion of this muscle forms the eyelids.
The nasalis muscle, together with the tissues and skin, forms the side plane of the nose.
In accordance with the Anatomy in Art, to make a proper placement of the lips, the following rule can be used: you can divide the first third of the face in half, which is the middle of the distance between the nose-line and the chin-line, and position the bottom edge of the lower lip on this middle line. This will help you avoid the beginners’ mistake of placing the lips too low on the face.
The outer ear, which anatomically is referred to as the auricle, has a curved shell-like shape and consists of three major parts:
• The Concha
• The Helix
• The Antihelix
The helix is the outer rim of the ear. It has a shape which is similar to the letter “C”. The lower part of the ear is called the lobule or earlobe.
The inner rim of the ear is called the antihelix. The upper part of the antihelix splits into two arms. Similar to the helix, the antihelix terminates into the lobule, but on the inside of the edge. The concha has the structure of a bowl.
Other elements of the ear are:
• The tragus (which protects the ear canal)
• The antitragus (which sits opposite the tragus)
• The ear notch (which is positioned between the tragus and antitragus)
On the profile view of the face, the distance between the ear and the outer corner of the eye is roughly equal to the distance from the nose-line to the chin-line, or one third of the face.
Anatomy in Art – Drawing portraits with anatomy knowledge
Every face is very individual and therefore, all canons or proportional systems of anatomy in art are just guidance rather than absolute rules. Individual proportions and sizes of facial features will vary from person to person. That’s what makes people faces recognizable and unique.
When drawing a portrait using rules of anatomy in art, proficient fine artists always keep in mind what lies beneath the skin, and the knowledge of the human head’s anatomy serves a very special role in portraying realistic and believable portraits.
How to draw hairs – Avoiding common mistakes
Sometimes, beginners have challenges when it comes to drawing hair. There are several mistakes you need to be aware of in order to avoid them. Here is what you should not do:
– Do not attempt to depict individual hairs. Instead, treat a hairstyle as a unified mass with its volume and shape. This shape goes around the cranium, repeating its form. The hair-mass has its thickness, ‘feel’ this thickness on the drawing.
– Do not do random abstract scribbling and doodling to portray hair. Realistic portrait drawing requires a realistically depicted hairstyle.
– Do not render hairstyle shading ‘flat’. As any three-dimensional object, a hairstyle has its form, which reflects and absorbs the light. It has highlight, light, mid-tones and shadows. It also can have casted shadows and accents. All those areas have different tonal values.
– Do not do pencil rendering in random directions. Instead, use the natural flow of hair as a guide for the direction of your pencil strokes. Strokes can be short or long, straight or curved, depending on the particular hairstyle. But always go along the hair, not across it.
– Do not start with small details, trying to render them to finished perfection. Instead, begin with big masses and progress to smaller areas. Individual curls can be taken care of when big masses are pencilled out.
– Do not concentrate on the hairstyle more than you do on the face. It is better to under-render a hairstyle than to over-render it. Leave something for the imagination of the viewer.
- Receive 15 new videos monthly (45 in total)
- Incredible discount – $4,164
- Bonuses - Fine Art eBooks and Videos
- Drawing Academy Diploma of Excellence after course completion in 3 months
- Personal coaching by Drawing Academy Tutors
- Lifetime membership. Free after the 3rd month

- Immediate access to all 45 video lessons
- Incredible discount – $4,198
- Bonuses - Fine Art eBooks and Videos
- Drawing Academy Diploma of Excellence after course completion in 3 months
- Personal coaching by Drawing Academy Tutors
- Lifetime membership. No more payments