How to Draw Portraits – Drawing a classical portrait step by step
In this video part you will discover the classical “How to Draw Portraits” approach.
Enroll in the Drawing Academy Course
Pay once - Enjoy forever!
Only $297
How to Draw Portraits
When some artist tells you that his or her portrait drawing is not looking like the model because it is not yet finished, then you know there is deeper trouble with the picture. Most likely the artist didn’t follow the classical steps of the drawing, or the constructive linear drawing was done incorrectly or even skipped altogether. To avoid such mistakes, you need to make sure that the portrait has likeness from the very beginning. Fixing it with shading will not help.
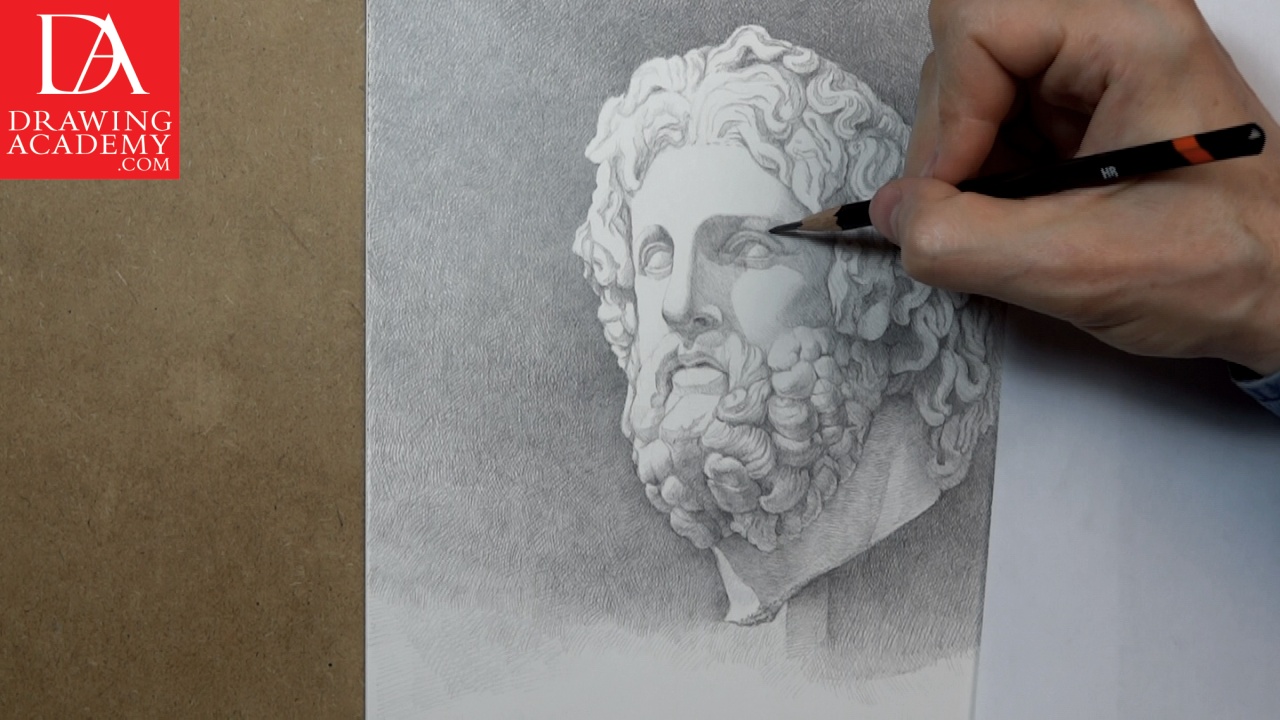
If your ambition is to become a proficient fine artist, make specific goals for every artwork you do. For example, this drawing of the Greek god, Asklepios, is intended to be a good exercise for drawing a portrait with facial hairs.
It also serves the purpose of helping you practice the “how to draw portraits” classical approach sequence.
Here’s the review of the traditional “How to Draw Portraits” approach:
1. Before starting the artwork, observe a model from various points of view and decide on the point to be used for drawing.
2. Choose your paper layout, either: vertical or horizontal.
3. Visualize the intended artwork and imagine it on the drawing surface.
4. Mark the overall mass of the head, indicate the top, bottom, left and right edges of the future portrait. Make sure you have sufficient lead room.
5. Draw the central line of the face, depict the head turn, is it profile, three-quarter or frontal view?
6. Establish the two big masses of the head – the cranial mass and the face mass.
7. Mark the eye-line and depict the head point of view. Do you see it from above, below or straight on?
8. Establish proportions of the head and face. Where are the lines of eyebrows, base of the nose, the mouth and the roots of hairline?
9. Mark the position of the ears.
10. Depict the proportions of the neck and shoulders.
11. Mark the big masses of the hairstyle.
12. Draw approximated geometrical forms of smaller details like the eyes, nose, mouth, etc. You can indicate shaded areas by very light shading.
13. Fine-tune the contours of the head and face; draw facial features with more precision. The drawing process goes from common shapes and forms to smaller individual features. You can apply another layer of very light shading to help in establishing the three-dimensional nature of the head.
14. Continue rendering in graphite pencil – going from general forms to smaller details and from dark shadows to lighter mid-tones.
15. Apply shading gradually in multiple layers of hatching. Remember that the head has spatial environment and establish it by rendering the background, as well.
16. Progress to the smaller details and deeper tonal values. Pay attention to the smaller details.
17. When the artwork is almost completed, turn your attention to the big masses once again. Work in the direction from small details to bigger areas to unify the drawing.
18. Check the drawing once again and fix any final things you see.
19. Make some artistic accents, which will attract the attention of the viewer to certain features or areas of drawing, be creative and manipulative in what you want to focus the viewer’s gaze on.
20. It is better to leave the artwork just before it is completely finished than overwork and spoil it.
I hope this classical sequence of drawing steps will be helpful to you to improve your drawing approach.
Keep practicing. Your drawing skills will follow your desire of becoming a proficient fine artist.


