Discover How to Draw Buildings
In this video lesson, you will discover How to Draw Buildings.
Enroll in the Drawing Academy Course
Pay once - Enjoy forever!
Only $297
How to Draw Buildings – Ink Drawing Methods
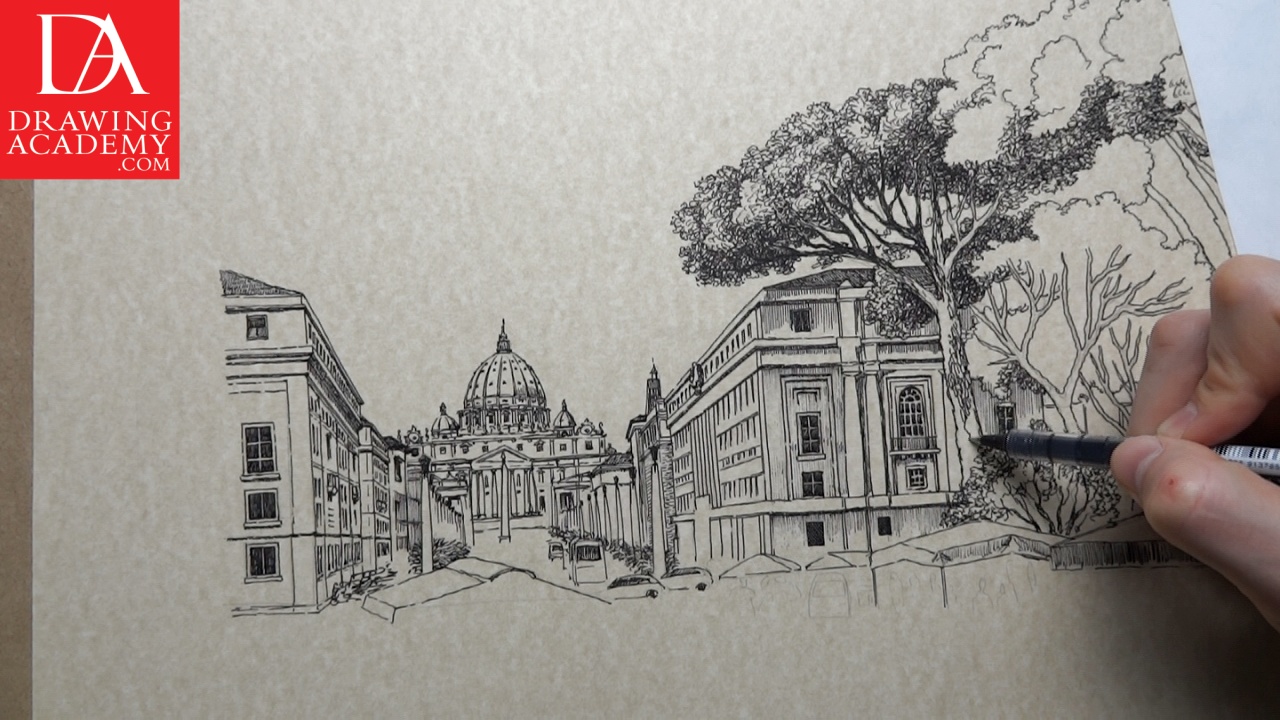
We continue the “How to Draw Buildings” video lesson. In this method, the thickness of lines will not vary. However, tree-trunks and crown leaves are drawn with curved lines. The curving of the lines, in shading, adds considerably to the force of the relief, and suggests much stronger modelling in ink drawing.
When it comes to the “How to Draw Buildings” drawing methods, lines drawn down the forms give an appearance of great strength and toughness, a tense look. This is a great approach for buildings, and city architecture when making an ink drawing.
To sum up the method of How to Draw Buildings in ink: the lines of shading are made parallel in a direction that comes easy to the hand, unless some quality in the form suggests they’re following other directions. So, when you are in doubt as to what direction they should follow, draw them on the parallel principle. This preserves a unity in your work, and allows the lines, drawn in other directions for special reasons, to tell expressively in your ink drawing.
You might consider giving a brown ink wash to your black ink drawing. For that purpose, in this “How to Draw Buildings” video, the Windsor & Newton Nut Brown ink can be used. Feel free to choose another brand and color variation that is more suited to your drawing. Alternatively, watercolor paint would do just as good a job as ink. A round pointed-tip brush number six is selected for this task. You may go for a synthetic or natural hair paintbrush suited for inks and water-based paints.
The brown wash is applied in a single layer on top of black ink drawing, starting from the darkest areas of the drawing. Most of the time, one layer of wash is sufficient to give a nice sepia effect to the ink drawing. In the darkest areas, you may find it necessary to repeat the wash; usually two or three coats are enough to achieve the deep brown effect of the shadows.
Brown ink dries quite quickly, and removing it when it’s dry isn’t possible, without damaging the artwork, so a certain degree of brushwork discipline is required in this step. If you make a mistake, you could try diluting the wet ink with water, and remove it with soft tissue paper from your ink drawing.
The mid-tones of the ink drawing can be washed in ink diluted with water. The degree of dilution should be tested first. If a second layer of brown wash is required in some places, to darken up tones, it is advisable to do it only when the previous coat of the ink drawing is completely dry.
Brown ink diluted with more water is good for darker areas of clouds in the sky. It should be done in a very transparent manner, to keep the appearance of an atmospheric perspective.
The final step in this “How to Draw Buildings” video is to wash it in white gouache. Windsor & Newton Designers Gouache is the best choice for this task. However, you may use any other suitable quality white gouache brand, or even try white watercolor paint. Diluting gouache in water is necessary for the wash; you can’t really paint in gouache straight from the tube.
We are starting in white from the lightest areas of the drawing. The tone of yellow-brown paper serves the purpose of mid-tones in this drawing; so white wash does not overlap the brown wash, but rather highlights the light areas of the ink drawing.
In this “How to Draw Buildings” video, clouds also have light and shadows; applying white wash is a great way to express cloud shapes. Aerial perspective should be used when highlighting clouds – the further away the clouds, the lower they are positioned on the drawing, and the smaller they become in size.
Only practice will help you master your ink drawing skills. Great art starts with a great drawing.


