La Bella Principessa – Drawing in Colored Pencil
In this video lesson you will discover how to transfer a preparatory drawing in colored pencil on a toned water-colour paper and the process of drawing in colored pencil.
Enroll in the Drawing Academy Course
Pay once - Enjoy forever!
Only $297
Transferring drawing in colored pencil
The sketch in graphite pencil is done as a mirror image of the artwork intended. In this video part, you will see why it needs to be reversed and how to transfer this sketch onto watercolour paper for Drawing in Colored Pencil.
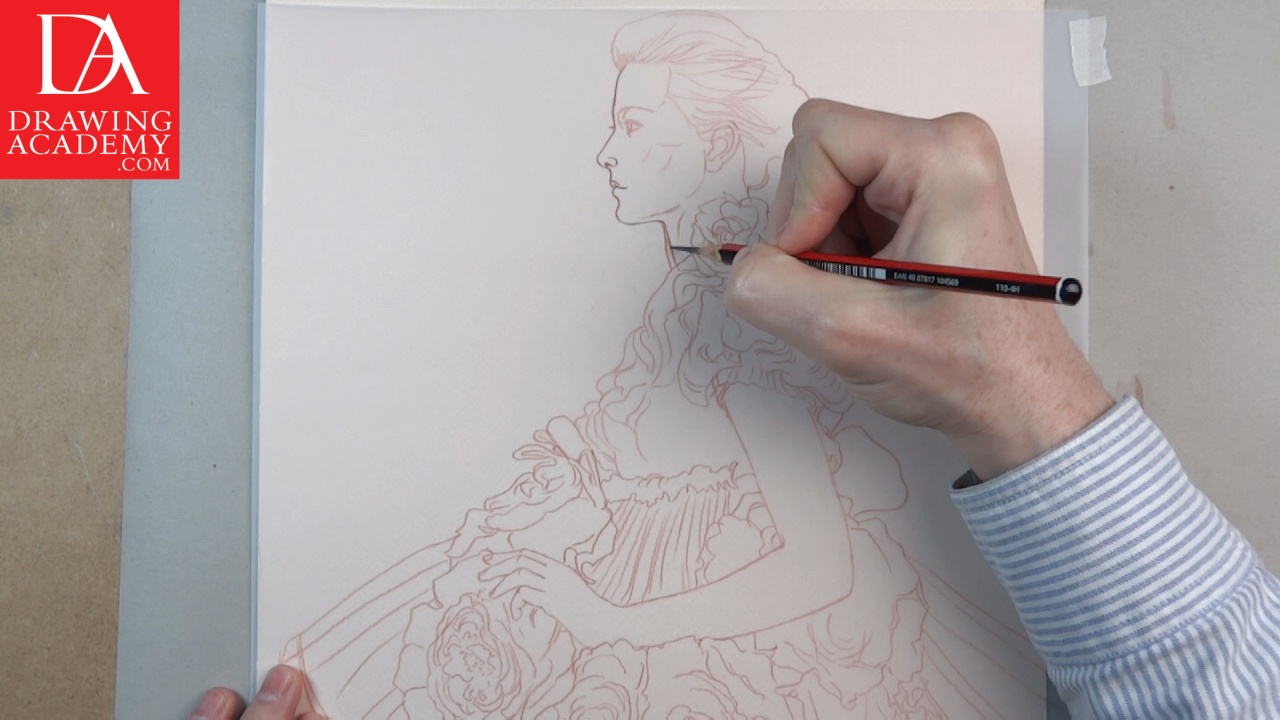
I will use tracing paper to make an outline in red pencil. The tracing paper is fixed to the sketch with masking tape.
The drawing outlines are carefully repeated in red pencil on the tracing paper. The final drawing will be done on the tinted watercolour paper in the same red pencil. I want the transferred outline to be in the same colour and become an integral part of the artwork.
There are reasons why I want to transfer this drawing rather than draw directly on the watercolour paper. This Lyra Rembrandt-Polycolor pencil is oil-based and therefore very difficult to erase. So fixing mistakes done in red pencil is not an option. Using a rubber eraser might damage the surface of the watercolour paper.
Making a graphite sketch on top of an already tinted in watercolour paper is also not suitable option. In this case, any necessary erasing will take off the watercolour paint from the paper leaving lighter blemishes.
So, that is why we are going through those extra steps of making a separate sketch and then transferring it.
Toning watercolour paper for Drawing in Colored Pencil
I want to have a coloured background for this artwork. For this purpose, I will use premium watercolour paints made in Russia. They come in an unattractive plastic box but have the highest quality I have ever come across.
I have pre-mixed the necessary amount of paint with water. The mix has a yellow-orange colour. There are many ready-made tinted papers available in art supply shops. However, the colour range is limited. Mixing your own tint gives unlimited variations of colours.
I am using a round squirrel brush. It is very soft and takes plenty of water. These qualities are essential for a good watercolour wash.
With the brush fully filled with the watercolour paint, I make lines across the paper’s width. The drawing board is tilted about 20°. This tilt makes water flow to the bottom edge of the paint line. Every next brushstroke slightly overlaps the previous one. The watercolour freely flows from one row to another.
The main objective here is to keep going at a steady speed with a constant amount of paint on the brush and paper. In this way, you will achieve a very smooth tone with no gradations or visible lines. I have to tell you that stopping in the middle, for any reason, is not allowed. If you have started the tinting, you must finish the sheet of paper in one attempt. For that reason, you need to make sure you have enough pre-mixed watercolour paint before you start the process.
Transferring drawing on the watercolour paper
When the watercolour tint is dry, I place the tracing paper with the red pencil outlines on top so the red marks are facing the drawing surface. The sharply pointed, hard grade, graphite pencil will be used as a stylus.
I repeat every single outline once again with the pencil. In fact, even metal nail or pin will be suited for this job. However, I want to see what lines have been transferred during the process and graphite pencil makes its easier.
The tracing paper is fixed to the drawing board with masking tape. I want to keep the watercolour paper safe from any damage…even from the masking tape.
Transferring from the tracing paper for Drawing in Colored Pencil requires precision. Your pencil has to be well-sharpened for that reason. The tracing paper is quite abrasive. That is why I am using a 4H grade pencil that will keep its sharp point for a longer time.
The image will be reversed, like in a mirror, because the tracing paper has been turned over to another side.
When all outlines are repeated in graphite pencil on the tracing paper, the drawing is transferred.
Drawing in Colored Pencil
For the “La Bella Principessa” Drawing in Colored Pencil, I will use red pencil. The Indian Red colour of the Lyra Rembrandt-Polycolor brand is chosen. Another similar in colour pencil, by the same brand, which can be used is, Venetian Red. I like it a bit less as it gives slightly “waxier” marks and doesn’t keep its tip sharp for as long as Indian Red. However, there are 72 colours in this line and I will leave your choice up to your personal preferences and creative tasks.
The Lyra brand pencils are very smooth and produce tones that can be deepened without “wax build up”.
My red pencil is well sharpened, so about 1.5 centimetres or half an inch of its lead is visible. I will keep re-sharpening the pencil throughout the drawing to ensure it has a well-pointed tip.
The watercolour paper has a medium grain and the pencil’s tip easily goes up and down the paper texture. A blunt pencil would not give the same effect. It will glide across the grain tops and leave gaps in the marks.
Like in drawing with graphite pencil, I want the portrait to develop simultaneously. That is why I have no intention of finishing one particular part of the lady’s head before moving my attention to another part of her portrait.


