Discover What to Draw
Video Lesson Description
In this video lesson you will discover what to draw and how to draw using constructive drawing methods. This video part includes the following topics:
• The importance of the constructive linear drawing,
• How simple geometrical objects can be useful to draw more complex things that combine those simple objects,
• And how to use a professional tonal rendering to achieve the best results.

What to Draw – Victorian Urn Drawing
When it comes to a question what to draw, you need to keep in mind that almost all objects around us can be simplified to some kind of geometrical shapes. Using such approximation a fine artist can depict very complex forms, like a human body for example. When you think what to draw, remember that the foundation of complex objects lies in their simpler forms. The knowledge and experience of drawing such simple geometrical forms is essential for any fine artist who wishes to perfect drawing skills.
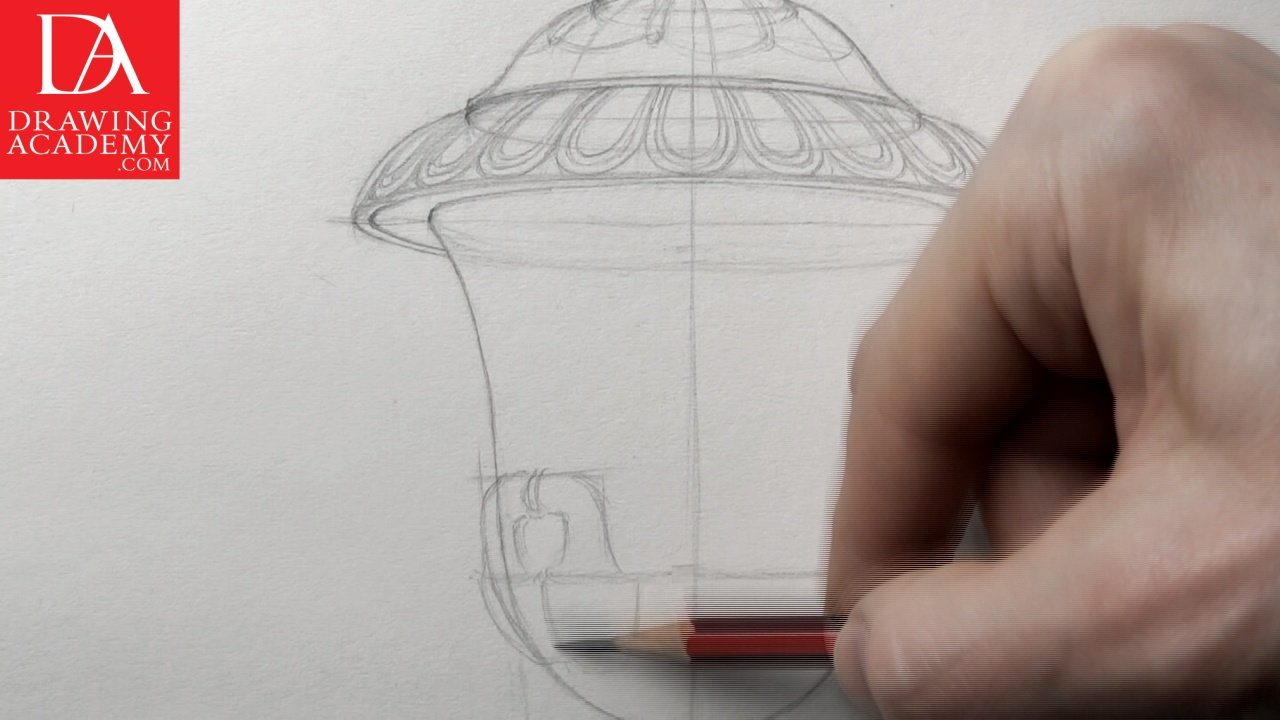
In this video part you will discover what to draw and how to draw objects on example of a Victorian urn, which has quite complex geometrical shape. It is marvelously carved in marble and has a very distinct geometrical appearance.
When you’ve decided what to draw, the next step is to consider geometrical shapes of an object. Constructive drawing of this geometrical urn includes the main vertical axis, which is a virtual line that goes from the very top of the urn to its plinth; the horizontal axes, which are necessary for drawing precise ovals of rounded urn body.
What to draw next comes easy when you have main axes in place. Urn’s ellipses are based on the vertical and horizontal axes. The rules of perspective must be applied here. Making correct ovals is an essential drawing skill.
You need to be aware that the oval has rounded ends on the left and right sides. Regardless of how slim an oval is, its ends are never to be drawn with sharp points. So, there is no question what to draw – rounded edges or sharp corners when drawing a circle in perspective – always make oval sides rounded.
If you are wondering what to draw – slim ovals or rounder ones, the relationship between an oval’s proportions and its relative position to the horizon line are described in great detail in the corresponding Drawing Academy video. In brief, the further away on the drawing a circle shape from the horizon line is, the more rounded shape it has. Imagine a stack of circles with some distance between them. The one closest to the horizon line on the drawing has the slimmest shape; other ovals become more rounded the further away from the horizon line they seem.
The top lid has an “egg and dart” decoration. Such ornamental devices are sometimes also referred to as an “egg and tongue” pattern. It takes its origin back to the ancient Greek culture. It decorates the Ionic order as well as many other styles of classical architecture. The lower part of the urn’s lid is designed as a circular ‘ovolo’ moulding, with a repeating design motif of rounded egg-like shapes and triangular leafs between them.
The geometrical shapes constructive drawing needs to be done as if it is completely transparent. It is like drawing a wireframe. Such approach helps to draw all elements correctly.
When you know “How to Draw”, then “What to Draw” becomes a question of choice. With sufficient knowledge of drawing techniques you will be ale to draw anything you want.
The purpose of this drawing is to show you how quite complex marble urns with lots of details and shapes can be subdivided into smaller parts. These parts can be easily depicted one by one in a quick but precise sketch. I do not intend to finish this drawing, as its main purpose is accomplished.
Here are the main steps of this exercise:
• We started with the imaginary symmetry line that goes vertically from the top of the vase to the bottom,
• Then we measured and divided the vase into its main parts: the top lid, the basket and the plinth,
• After that, we draw all main proportions of the vase,
• The vase’s lid, the basket and the foot are round symmetrical objects, which were drawn with a number of ovals and side-edge lines,
• Outlining ovals is one of the essential drawing skills you shall master,
• The cuboid plinth was depicted in two-point perspective. Imaginary helping lines, like diagonals, are great guides for drawing with precision,
• The whole sketch was done as a wireframe; as if the vase is completely transparent,
• We draw not only what we see, but what we know,
• What to draw is an easy question when you know how to draw.
- Receive 15 new videos monthly (45 in total)
- Incredible discount – $4,164
- Bonuses - Fine Art eBooks and Videos
- Drawing Academy Diploma of Excellence after course completion in 3 months
- Personal coaching by Drawing Academy Tutors
- Lifetime membership. Free after the 3rd month

- Immediate access to all 45 video lessons
- Incredible discount – $4,198
- Bonuses - Fine Art eBooks and Videos
- Drawing Academy Diploma of Excellence after course completion in 3 months
- Personal coaching by Drawing Academy Tutors
- Lifetime membership. No more payments
