Discover How to Draw People in Silverpoint
Video Lesson Description
In this video lesson you will discover How to Draw People using the silverpoint drawing technique.

The Silverpoint Drawing Technique Description
The silverpoint technique is quite thorough. This method takes time and there are no shortcuts. Silverpoint allows for no mistakes. Metal marks are almost impossible to erase with an eraser; in addition, eraser will leave marks on the gouache grounded paper that will spoil the appearance of artwork.
Silverpoint technique requires different skills as opposed to making graphite or charcoal drawings.
For this “How to Draw People” lesson I’ve used the Nickel-Silver metal-point. It is a very thin 0.9 millimetre thick piece of wire, which is held in a mechanical pencil.
I begin the “How to Draw People” lesson with a series of short, parallel strokes in silverpoint. The pressure on the silverpoint drawing tool is very light; after all, it is a piece of silver wire that can easily damage the ground and paper itself. One of the main characteristics of the silverpoint drawing technique is the impossibility of making strong dark marks from the first attempt. Using a metal stylus leaves light-grey marks that can be darkened by repetition of strokes, slowly building up tonal volumes.
When you considering How to Draw People in silverpoint, keep in mind that silverpoint technique requires a very sensitive touch. Every line I do on this artwork is placed with care. There is no margin for error. Even the lightest lines are clearly visible.
I can only go from lighter marks to darker; erasing to revert back to a lighter tone in case of over-rendering is not an option.
The silverpoint leaves small deposits on coated paper. The surface should be slightly rough; this is where a special ground becomes helpful. Gouache, chalk and titanium white pigment make the surface a bit abrasive.
Various metals can be used for metal-point drawings. Silver, Gold, Brass and Nickel-Silver are all suitable for that purpose. Not all metals behave the same. For example, silver metal-point goes through a chemical reaction when its particles are deposited on coated paper, the faint silver lines will “age”, or tarnish over time. Silver-point drawings will eventually turn dark brown. The brass-point will change its color to a greenish tint. While gold, which is the most stable of the metals, will keep its warm-grey appearance throughout the centuries.
Silverpoint Paper Ground Preparation
When thinking How to Draw People in silverpoint, remember that silverpoint point would only leave a mark on special grounds.
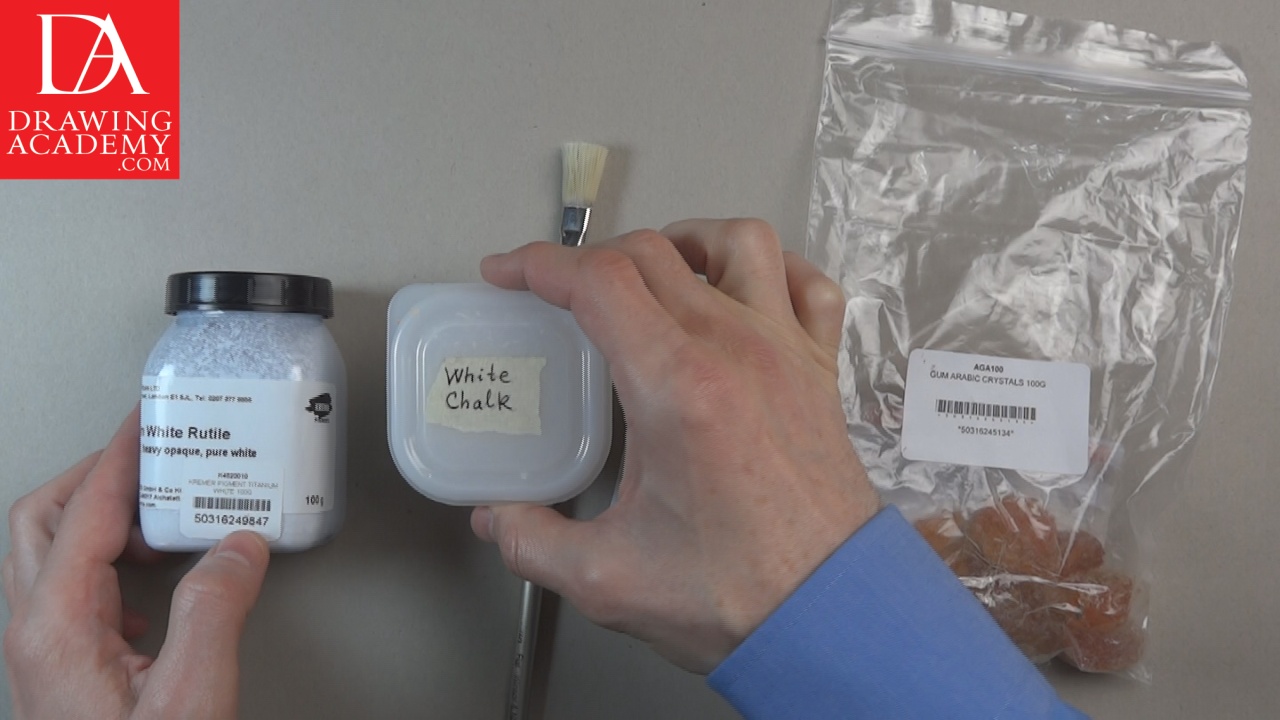
However, to tint the white ground, I will add Vandyke Brown Gouache. Also, to improve the metal marks, I will add to the mix Titanium White, which is a very fine and opaque pigment and White Chalk.
Gouache has a Gum Arabic binding medium, but it would not be enough to bind Titanium White and White Chalk. That is why some extra Gum Arabic will be added into the mix.
Gum Arabic comes in liquid and crystal form. Crystals can be diluted in warm water and then filtered for purity. I squeeze the White Gouache into the Gum Arabic solution and add a little bit of Vandyke Brown Gouache to change the ground to a pure white color. White Chalk and Titanium White pigment are also added to the ground blend. All ingredients are mixed thoroughly. You can test various proportions of pigments and Gum Arabic. Every variation in proportion will give you slightly different grounds that will respond in some way to various metal points.
Good quality, heavy-duty drawing paper will be used as the support for the silverpoint ground. I apply the ground with a flat brush over the paper. The mixture is quite opaque and covers white paper nicely. When the first layer is completely dry, I will repeat with another layer of ground. You can do as many coats as required. Dried layers can be sandpapered before applying the next coat.
Silverpoint Drawing Technique History
The history of the silverpoint drawing technique goes back many centuries. First, it was used as writing and marking tool; many medieval parchment manuscripts have writing lines and margins marked in silverpoint. Fine artists used silverpoint as a drawing medium. There are many silver point drawings left by Leonardo da Vinci, Michelangelo, Raphael, Sandro Botticelli, Albrecht Dürer and other Great Masters.
In his book, Il Libre dell’ Arte, Cennini gives instruction to fine artist that the silverpoint technique should be mastered first by the apprentice before advancing to the medium of painting. This advice corresponds well with the drawing in silverpoint by Raphael. A beautifully drawn portrait of a boy is assumed to be his self portrait before the age of 17, when he got his first painting commission. Another well-known silverpoint portrait is done by young Albrecht Dürer at the age of 13, when he was an assistant in his father’s goldsmith workshop.
The reason why Cennini was insisting on art apprentices mastering silverpoint first, is because this technique requires much greater control and precision than any other drawing media. The discipline of metal-point drawing helps to develop a most valuable skill for draftsmen who want to improve their fine art skills.
The silverpoint drawing technique was used by the Old Masters before graphite became available as a drawing medium. This technique is characterised by the subtlety of light tones.
In the beginning of 2012, I was fortunate to visit the Leonardo da Vinci exhibition in The Nation Gallery, London. They say this was the biggest exhibition of Leonardo’s works ever displayed, and most likely it would never be repeated because of the fragility of his artworks. Among his oil paintings were numerous drawings in silverpoint. I was mesmerized by his silverpoint drawings; they were so simple by subject yet so sophisticated by performance. Without any doubts, he is the greatest draftsperson who has ever lived. Over time, his silverpoints became oxidized and turned brown, this color change only enhanced their appearance.
I am very much fond of the metal-point technique. It might be inflexible and quite difficult to use, but such results are not achievable by any other drawing media. I like it for the ability to produce very fine and delicate marks. This is a tool of choice for the highly skilled draftsman.
Apart from challenges with the drawing process itself, metal-point artwork requires special attention after the drawing is finished. Metal-point drawings have to be handled with care. They require special storage conditions as board ground or paper coating are very fragile and can be easily blemished.
- Receive 15 new videos monthly (45 in total)
- Incredible discount – $4,164
- Bonuses - Fine Art eBooks and Videos
- Drawing Academy Diploma of Excellence after course completion in 3 months
- Personal coaching by Drawing Academy Tutors
- Lifetime membership. Free after the 3rd month

- Immediate access to all 45 video lessons
- Incredible discount – $4,198
- Bonuses - Fine Art eBooks and Videos
- Drawing Academy Diploma of Excellence after course completion in 3 months
- Personal coaching by Drawing Academy Tutors
- Lifetime membership. No more payments