Drawing a Portrait – Classical way of making a portrait in graphite pencil
In the this video part of Drawing a Portrait lesson I will explain in detail, a step-by-step method of how to draw a portrait in a classical way.
Enroll in the Drawing Academy Course
Pay once - Enjoy forever!
Only $297
Drawing a Portrait
In the previous part we did linear constructive outlines of the Amazon’s head.
By this stage of the drawing a portrait process, all contours of the head have been approximated in short, straight lines. Every line has its length and angle. Such shape approximation allows simplifying complex outlines and drawing with more precision. Every straight line can be extended so it crosses some other point of the contour. Check where such points are located on the drawing and compare their location on the model. This is a perfect way to make sure that the constructive linear drawing is correct when drawing a portrait.
When you are drawing a portrait, you can also check the angles of such straight lines using a pencil as a measuring tool. Once again, align the pencil with the line in question and make sure it has the same tilt as you see on the model. In addition to angles, observe where such lines cross other contours.
This video on drawing a portrait will explain how to find multiple lines that can be extended and use them to check the accuracy of your drawing. At this step of drawing a portrait we have yet to start the tonal rendering, so it is a perfect time to make some final checks and fix any mistakes.
It is up to you how many measurements you can find and check when you drawing a portrait. The more the better.

To achieve desired accuracy when drawing a portrait, you need to think through the process in your head. Ask yourself questions such as: “Where will this line cross the opposite contour?” “How much longer is this line compared to that one?” “What is the tilt of this line?” “Will this line cross or align with any other points if it were to be extended and if so, where would those points would be?”, and so on. You can also make checks by applying vertical lines.
I think it is now clearer why we are using straight lines at this step when we’re drawing a portrait. Checking the slope of curved lines would be more difficult, especially for a beginner.
When you are completely satisfied with the precision of your constructive linear drawing and have fixed all errors if any, you can erase those virtual straight lines and finalize the outlines and contours.
When the linear drawing is complete we can proceed with rendering shades to give this portrait volume and a three-dimensional appearance. For this purpose, I am still using the HB grade pencil.
I begin the rendering with a very light touch of the pencil. This is white marble we are drawing, after all. The rendering will be done gradually, increasing the tonal values.
We start from the dark areas on the drawing. Every pencil stroke is done by a separate movement of the pencil by lifting it at the end of the line and making another stroke next to the previous one. I want to render lightly all shaded areas to establish the difference between light and shade. The pencil strokes are following the head’ contours, thus revealing its three-dimensional nature.
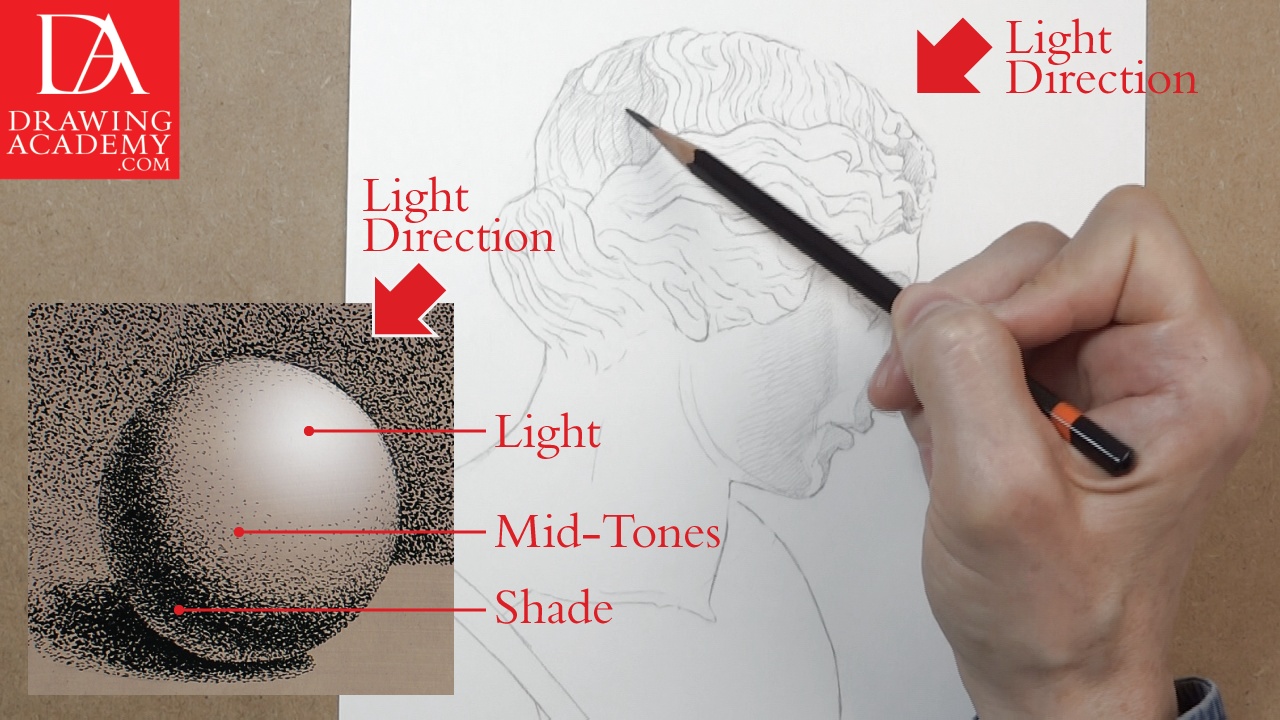
When rendering the shades on the portrait, always be aware of the direction of light. In this case, the light comes from the top-right.
The tonal values of this head can be grouped into three main parts: the Light, the Mid-tones and the Shades. The same is true for the head; it also has well-lit areas, mid-shades and dark shades. Despite the complex facial features and intricate hairstyle, the principle of shading remains the same. So, keep this in mind when you render tonal values. Gradually we will increase the values of shades and the gradation between light and shade will become more apparent.
Shaded areas have various tonal values. When you’re drawing a portrait, compare those areas to each other and ask yourself the following questions: “How much is one shade darker than another?” “What is the darkest spot on the model?” “By how much is the cast shadow darker than the form shadow?” “Where is the core shadow?” “Is there a dark accent?”,and so on. Only by constantly making such analysis will you consciously progress with your artwork and improve your drawing skills.
When rendering the hairstyle, do not start with separate curls, such details are insignificant at this initial stage. Depicting the overall volume of the hair is more important for now. Treat the hairstyle as one big mass and render its shades as a unified shape. All small details and individual curls will be taken care of later.
Drawing skills only come with practice. Drawing a portrait is a good topic for practicing drawing skills. It is important to do both quick sketches and long drawings. Quick sketches will help you to train your eyes and hand, while long drawings will give you the necessary analytical mindset, which is necessary for detailed well-rendered drawings.


