Linear perspective drawing – Cathedral drawing in two-point perspective
In this video lesson you will learn how to draw a cathedral using a two-point perspective. This building drawing is loosely based on the St Paul Cathedral in the City of London.
Enroll in the Drawing Academy Course
Pay once - Enjoy forever!
Only $297
Two-Point Perspective Drawing – First steps
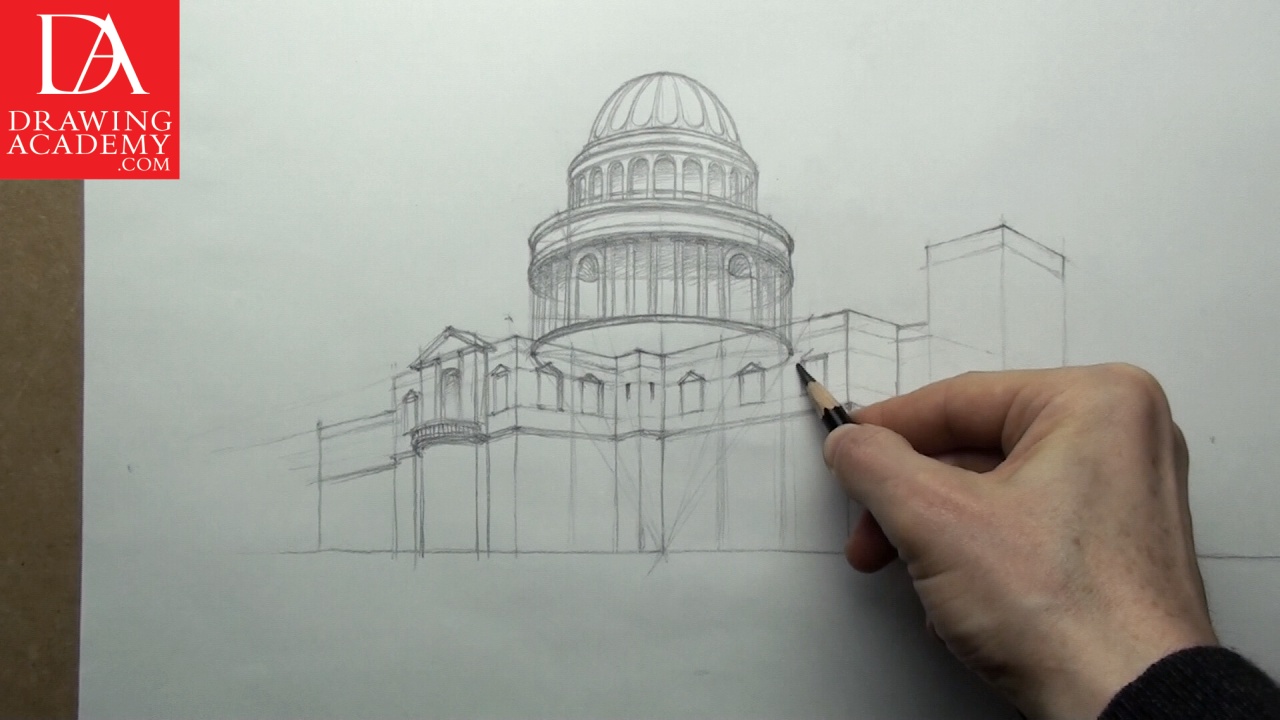
We begin the two-point perspective drawing with the horizon line and will concentrate mainly on the structure above this line. The horizon line is located at the viewer’s eye level.
The vertical line will go through the centre of the cathedral’s dome.
The cathedral’s walls are marked with lines tilted both ways – to the left and to the right.
All vertical lines will be drawn as totally vertical without any tilts.
There are two vanishing points in two-point perspective that will be used in this drawing. Both of these points are located outside the paper edge. When I draw angled lines pointing to these vanishing points I am not extending lines far enough to reach them. Instead, when making a two-point perspective drawing, I am judging the angles of tilt by eye, using the following perspective rule: the higher the line is positioned on this drawing, the greater its angle is. So lines close to the horizon will have very shallow angles, and lines further away from the horizon line have steeper angles.
The Stone Gallery oval is drawn on its vertical and horizontal axes. The imaginary square that inscribes this oval goes around it. It appears as the equal sided trapezium because of the perspective distortion.
The Golden Gallery’s drum is built on top of the Stone Gallery. The Golden Gallery is narrower and also has a circular shape in cross section. Its drum’s lower edge is drawn as an oval inside the Stone Gallery oval.
Once again I am using an one-point perspective to define the cuboid containing the Golden Gallery drum. Two angled lines run from the top to the vanishing point below. The cuboid’s top square plane looks like a trapezium in perspective and inscribes the top oval, representing a circular edge of the Golden Gallery.
The dome has ridges running downwards. These ridges are depicted as arcs going around the spherical shape of the dome. The arcs on the left hand side are bending to the left and on the right hand side to the right. The curvature of arcs increases, going from the dome’s middle to its edges. Ridges in the middle of the dome look almost vertical with very little bending.
The South Transept has a gabled roof that resembles the classical Greek architecture. The portal of this transept has steps and columns, which are arranged in a semi-circular shape.
St Paul’s Cathedral description
St Paul’s Cathedral dates back to 17th century and was built in English baroque that was based on the late Renaissance style. This cathedral replaced the older one that was destroyed in the Great Fire of London. Sir Christopher Wren designed this cathedral based on antique traditions of classical architecture. The impressive cathedral’s dome is inspired by St Peter’s Basilica in Rome. The cathedral was built in 32 years, opening for service in 1697.
The tower on the right hand side is a separate building. It stands on a foreground and looks like an integral part of the cathedral from this point of view. This tower’s walls parallel to the walls of the cathedral and therefore the same vanishing points of our two-point perspective will be used to draw it. The top part of this building is very elegant. The spire has an onion shape at its lower part. The balustrade runs around the tower’s roof.
Protecting paper from graphite smudging
Always try to avoid touching a paper with your hand when drawing in graphite pencil. No matter how clean your hands are, there is always some amount of grease present on a skin. Apart from greasing the paper you might smudge the graphite when resting a hand on a drawing.
How to hold a pencil
When you draw on a horizontal or near horizontal surface holding the pencil with two fingers and the thumb, only then resting your hand on a surface is appropriate. In this case, you may use a clean sheet of paper to place it between the hand and the drawing to protect it from smudging.
When shading in pencil, do not be tempted to smudge the graphite with a stump nor your finger. Smudged graphite looks amateurish, professional fine artists do not do that. The beauty of the graphite medium is in the well pronounced pencil strokes that can be varied in strength and direction.
Sharpening a pencil
It is always better to use a good sharpened pencil. Use a pencil knife or scalpel for sharpening. Mechanical or hand-held sharpeners are only good for children for safety reasons.
Using an eraser for graphite drawing
When you need to use an eraser, I would suggest choosing a white plastic one for harder surfaces and strong papers or soft kneadable eraser for less tough papers.


