How to Draw Hands in Black Ink
In this video lesson, you will discover How to Draw Hands in realistic manner using the sometimes challenging technique of pen and black ink.
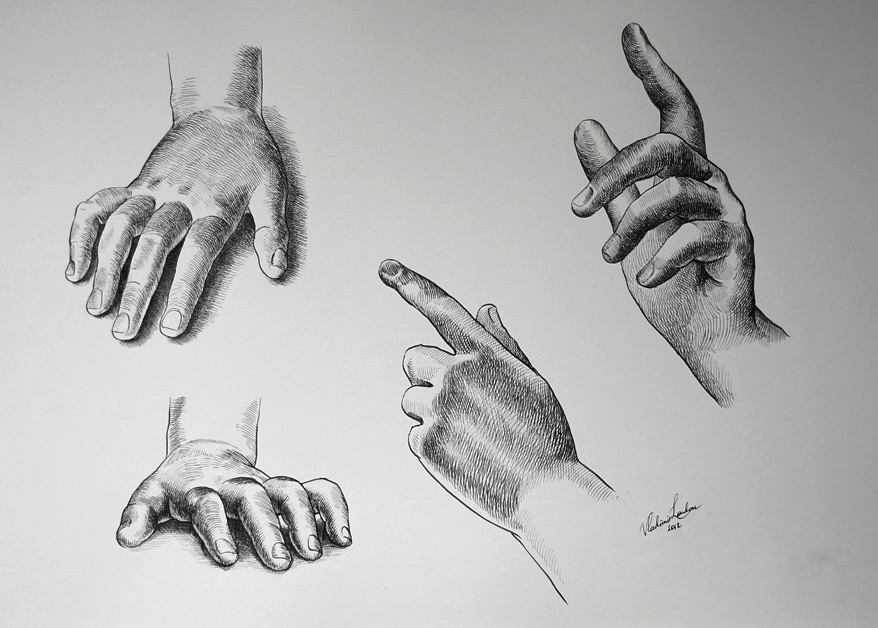
As the model, I will use this Victorian period sculpture dated back to 1842 and exhibited in the Victoria & Albert Museum, London. This marble sculpture, by Edward Hodges Baily, is called, Eve Listening to the Voice of Adam. Eve’s hands are intricately carved in marble and have nice nuances of shades of which I want to portray.
Enroll in the Drawing Academy Course
Pay once - Enjoy forever!
Only $297
How to Draw Hands
When it comes to the subject of ‘How to Draw Hands‘ in black ink, keep in mind that drawing in ink is quite different from the graphite drawing technique. First of all, the ink marks are not erasable. The greater deal of drawing discipline is required here for that reason. Also, ink marks cannot be varied in tonal values unlike pencil marks, which can be darker or lighter depending on the pressure on pencil.
Ink drawing can present some challenges for a beginner when he or she considers How to Draw Hands. When placing a mark on paper, you need to consider how it will affect the drawing, because the room for mistakes is limited. That is why practicing art-working in ink is a great way to improve your drawing skills.
When considering how to draw hands, remember that unlike a graphite pencil, the metal nib cannot go in any direction along the paper surface.
It is easy to glide it along the paper downwards or sideways, however, when it comes to moving it in an upward direction, the sharp metal nib can splatter the ink or even perforate the paper’s surface.
Before starting a drawing in ink, test the nib on the same quality paper. When thinking how to draw hands in ink and testing it first, you will know how much ink the metal nib needs to take in order to produce lines long enough and avoid bloating or splatters.
The black ink technique works the best on hot-pressed paper with a smooth surface. Such a surface can take a great deal of erasing, if required. Small mistakes can also be fixed by scraping any dried ink marks with a sharp scalpel blade.
In this “How to draw hands” video lesson you will see how the direction of the hatching varies, as well as, the length of lines. Such an approach gives a wider gamut to the artwork.
The word gamut, in this case, stands for the range of strokes used; it includes the variation of strokes length, direction, thickness, distance between them and strokes layers.
The wide gamut ink pictures look more appealing and interesting to a viewer.
hen you think ‘how to draw hands’, keep in mind that every line has the same pitch black colour, therefore the tonal values can be amplified by increasing pressure on the pen. Greater pressure will produce wider lines. Also, denser hatching with smaller gaps between the lines will produce darker tones. Please note, that even in the darkest areas, gaps between lines need to be present. Applying several layers of ink hatching will greatly increase the values of tones.
How to Draw Hands – The correct way of holding a pen
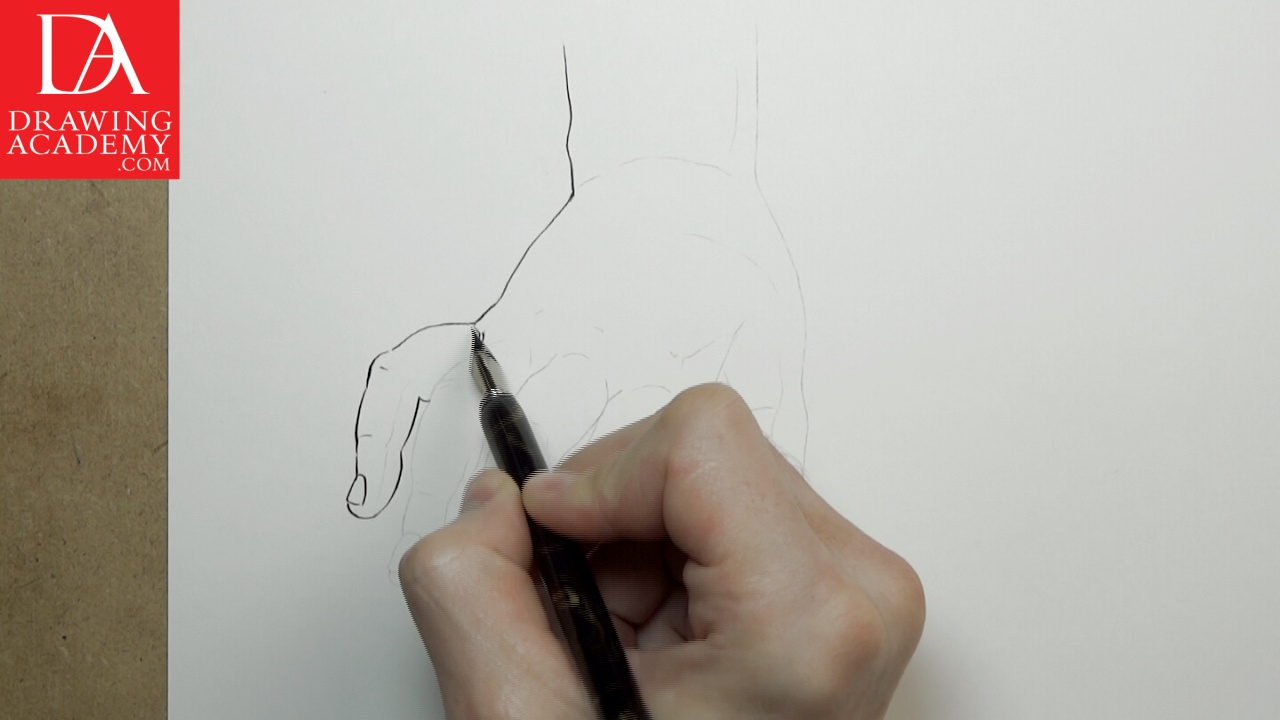
Drawing with a metal nib requires some degree of precision. That is why the correct way of holding a pen is crucial. The drawing board is tilted to about 25 degrees to the horizon level and I use the pen grip, which is similar to the writing position. The pen is held on my third finger and pushed down by my index finger, while supported from the side by the thumb.
The pen handle is pointing to my right shoulder; this is quite important. Such a grip gives better control and allows me to maintain constant pressure on the pen. When my fingers bend and extend, the tip of the nib glides in parallel to the paper, so I don’t have to make any additional moves to compensate for the pressure on the pen.
How to Draw Hands – Shading in Ink Along Contours
In this ‘How to draw hands’ lesson you will see how I render shades in ink with short, slightly curved lines. These lines go along the object contours. This method helps to reveal the three-dimensional nature of the hand. Contours are imaginary lines that can be produced by slicing an object, as if making cross-sections, in any desired direction. The cross-section line on the object surface is what we call a contour, in this instance.
The contour is not the same as an outline. We used the outlines to depict the hand in the beginning of this sketch. An outline is the visible line that goes along an object’s borders or edges.
Any object, including a hand, can have an infinite number of contours. Such contours are used as guides for hatching shades, using clearly visible individual lines, as we do right now for shading.
If you are a beginner, you don’t have to make fast gestures with the pen; take your time and concentrate on precision. This will give you better hand skills. If you are an advanced art student, you can set other tasks to accomplish. For example, you may practice free-flowing lines, which carry artistic and expressive appearance. Or, instead, you can diversify your range of the hatching techniques and polish your strokes style.
This “How to draw hands” video lesson features only four hand sketches. Every point of view presents its own unique appearance – which is good to portray – in order to get a better understanding of the human hand. Make as many hand sketches as you can in various media including, graphite pencil, ink, etc. Only practice will make your skills perfect.


