How to Draw a Leaf – Maple Leaf Drawing in Graphite Pencil
Video Lesson Description
In this video lesson, you will discover how to draw a leaf, its intricate organic shape and how to render leaf’s shades.

How to Draw a Leaf – Geometrical Shape Approach
A Maple leaf has quite a complex contour. Many veins radiate from the stalk-end; the leaf’s toothed outline has deep and shallow cuts. It is not an easy object to draw unless you use a geometrical shape approach.
When you think How to Draw a Leaf, keep in mind that it has 5 sides, or in other words, is a five-sided polygon. Such a shape is called a pentagon; the name derives from the Greek word, pente, which means “the number 5”.
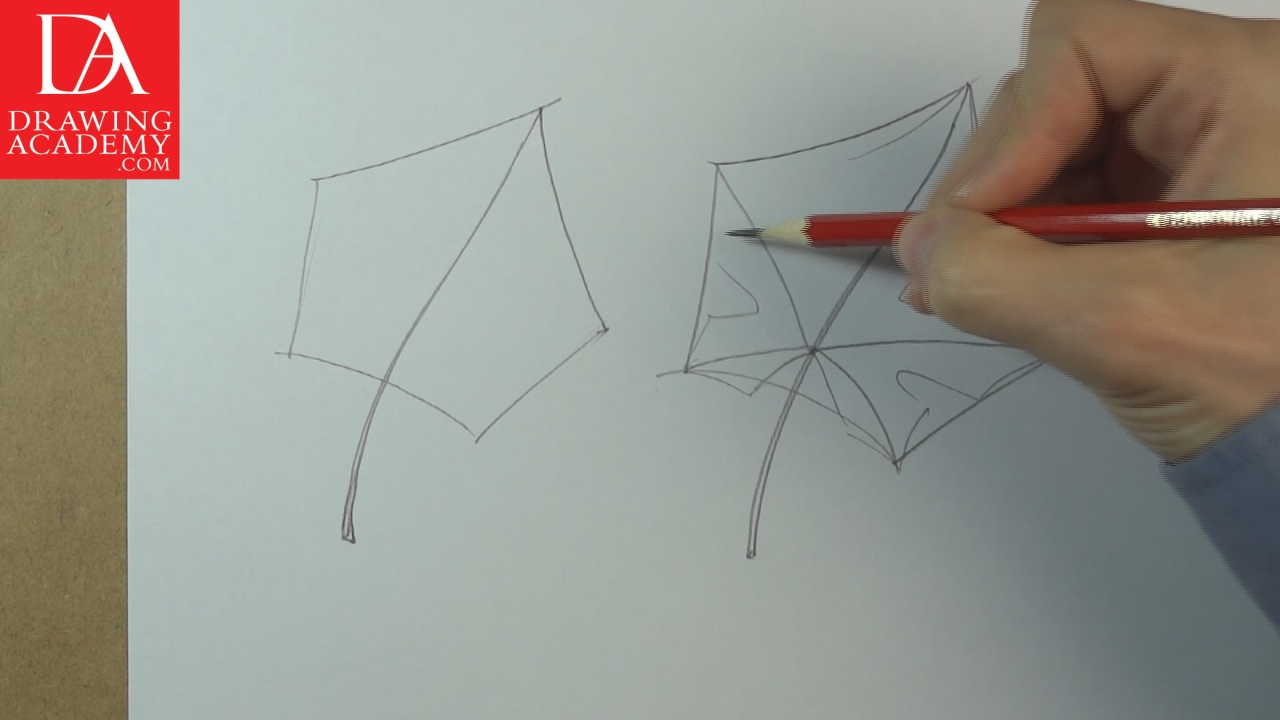
When leaf is starting to take shape, it is a time to add smaller “teeth” around the leaf edges.
In this “How to Draw a Leaf” lesson you will see how it can be done with ease and precision.
Smaller veins are located between the main veins. The web of veins fills almost the entire surface of the maple leaf.
How to Draw a Leaf
To draw an intricate leaf’s shape, the Points and Angles method can be used. The leaf’s outline is presented in straight lines under certain angles and points on those lines.
Every point is a place where a line changes direction. The angle of a direction is measured by a pencil. Points can be found on the intersection of lines.
When you’re considering How to Draw a Leaf, remember that the drawing should be progressing from the bigger shapes to the smaller ones.
Observe its nature and try to repeat the direction and position of the leaf’s veins. Note where they start and where they finish.
The leaf’s numerous small “teeth” are drawn last.
Age of Enlightenment
The art of botanical drawing comes from the Age of Enlightenment, when intellectual individuals turned their attention to nature and realized the importance of knowledge through the scientific methods. This cultural movement was developed throughout the 17th and 18th centuries in Europe and then in America. People started to travel more and made records of natural wonders, animals and plants. The realistic illustrations of plants were in demand.
How to Draw a Leaf – Depicting lights and shades of the maple leaf
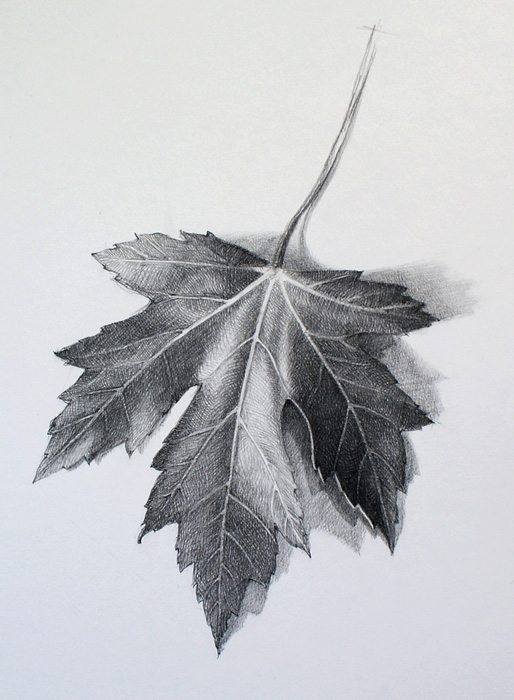
The maple leaf is almost flat. However, there are some uneven surfaces that reflect light and cast shadows. Hatching in graphite pencil helps to reveal leaf’s three-dimensional nature.
Answering a question of “How to Draw a Leaf” by rendering shades, I have to say that pencil hatching should begin from the darkest areas of the leaf.
Also, when it comes to the subject of “How to Draw a Leaf” by tonal rendering, professional shading approach is not to finish one particular part of the leaf before going for another one. Instead, all parts of the drawing should be developing simultaneously. Tonal volumes of shades are deepening gradually, working on various areas of the drawing one after another.
The direction of pencil strokes coincides with the direction of the leaf veins. I also do cross-hatching to give an appearance of the vein mesh on the surface of the maple leaf.
The cast shadow beneath the leaf has multiple borders because the leaf is lit with multiple sources of light.
Keep your pencil sharpened well at all times, it will help to render objects with precision.
Main veins of the leaf can be highlighted with a pointed kneaded eraser tip. This will give a more realistic look to the drawing. You can also erase a thin line along the edge of the leaf, which will give an appearance of the leaf’s thickness.
Observe nature and learn from it. The mastering of drawing art starts with copying nature.
- Receive 15 new videos monthly (45 in total)
- Incredible discount – $4,164
- Bonuses - Fine Art eBooks and Videos
- Drawing Academy Diploma of Excellence after course completion in 3 months
- Personal coaching by Drawing Academy Tutors
- Lifetime membership. Free after the 3rd month

- Immediate access to all 45 video lessons
- Incredible discount – $4,198
- Bonuses - Fine Art eBooks and Videos
- Drawing Academy Diploma of Excellence after course completion in 3 months
- Personal coaching by Drawing Academy Tutors
- Lifetime membership. No more payments