Discover What is Metal-Point
Video Lesson Description
In this video lesson I will answer the “What is Metal-Point” question. You will also discover how to render model’s portrait in metal-point using metal-point drawing techniques.

Drawing in Metal-Point
When it comes to the question of “What is Metal-Point” rendering techniques are and how to use them, I want to point that when rendering in metal-point shades or mid-tones of some particular area, I compare its value to other areas of the portrait.
If, for some reason, I decide to stop working on the portrait at any time, it would look unfinished but complete.
Avoiding Mistakes in Metal-Point
Answering a question “What is Metal-Point” and how to avoid metal-point rendering mistakes, I can give you an example that some amateur artists draw from one corner. They start from one point of the drawing, let’s say top-left corner, and go with the full tone from the very beginning. While such a method works well for pen and ink drawing or embroidering cloth, for a professional drawing, it is hardly acceptable.
Another common mistake you want to avoid is using the full tone the metal-point drawing tool can provide right from the beginning. When applying the full strength from the start, there is no room left to go darker when it is needed, Also, metal-point can easily scratch or damage the metal-point ground.
So, gradually developing tonal values is a much safer and more professional way to progress when drawing in metal-point.
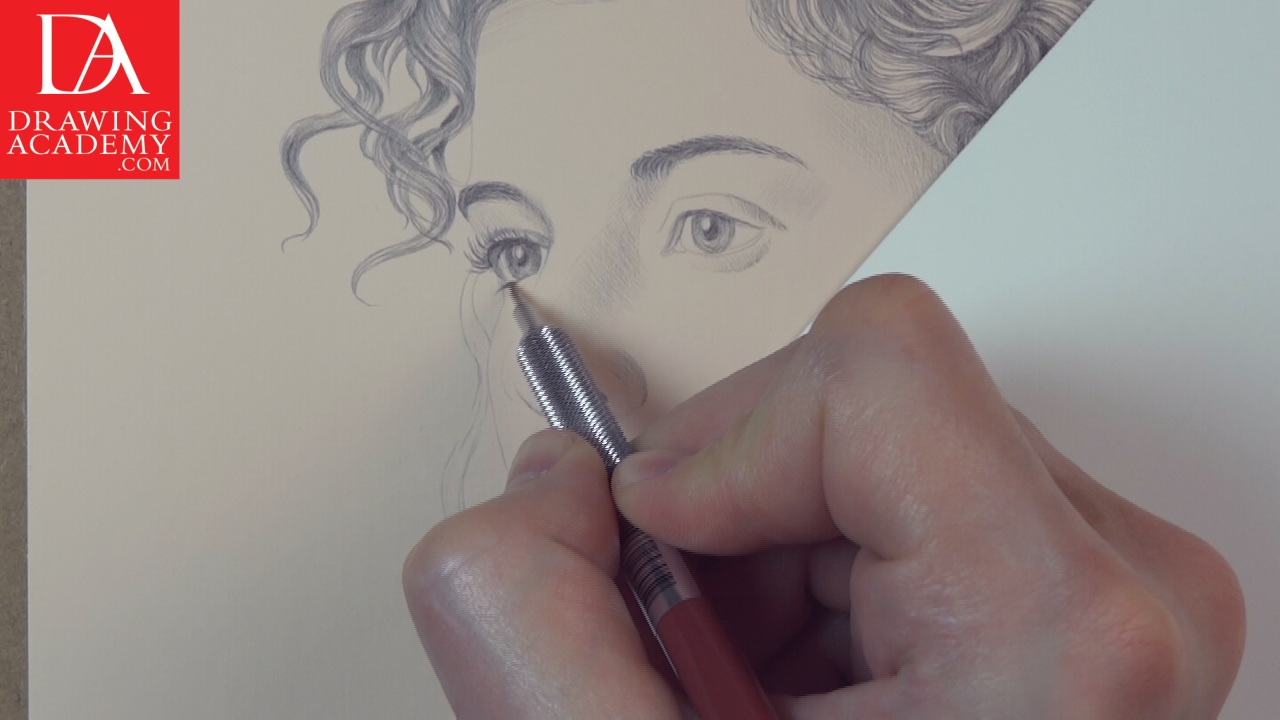
Drawing Eyes in Metal-Point
Usually, I am not a big fan of drawings featuring individually drawn eyelashes. In most cases it is done to “beatify” the drawing, which looks pretentious. However, the silverpoint media is so fine, that even the smallest details are easily achievable. Making tonal shapes for eyelashes would be too harsh for such delicate artwork.
When drawing eyes, here is one thing that you need to know. It is better to under-emphasise the lower eyelids because over-doing them might age the model and give a tired look to the face.
A very thin stylus that never goes blunt is an ideal tool for detailed drawing. The model’s eyes can be depicted with all the glory of a three-dimensional illusion. It is easy to draw the thickness of the eyelids and iris figures.
Drawing a Head in Metal-Point
A human head is a three-dimensional object that catches and reflects light the same as any other. Think and observe what parts of the head have the lightest tone, and what parts are the darkest. Mid-tones will be located between those two values. There is a virtual line that separates light areas from dark ones. Try to find this line and keep it in mind when making a drawing. This line is very important for a portrait because the model’s likeness depends on this line, as well.
When drawing a portrait in metal-point, you want it to have the likeness of the model; otherwise it is just a random head. You pay careful attention to the portrait proportions, the outer silhouette and the face contours; these all contribute to the correct structural drawing; however, it is just a half of story.
When it comes to shade rendering in metal-point, you also want to keep likeness. That means you need to match values of tones and borders of similar tone areas. This includes the accurate representation of a virtual line where one tone changes into another. Think about this line as a border between light and shadow and feel its three-dimensional shape. Even on a very rounded form like the model’s cheek, you can find this line between light and shade.
- Receive 15 new videos monthly (45 in total)
- Incredible discount – $4,164
- Bonuses - Fine Art eBooks and Videos
- Drawing Academy Diploma of Excellence after course completion in 3 months
- Personal coaching by Drawing Academy Tutors
- Lifetime membership. Free after the 3rd month

- Immediate access to all 45 video lessons
- Incredible discount – $4,198
- Bonuses - Fine Art eBooks and Videos
- Drawing Academy Diploma of Excellence after course completion in 3 months
- Personal coaching by Drawing Academy Tutors
- Lifetime membership. No more payments