How to Draw a Body Using Classical Drawing Methods
Video Lesson Description
In thin video lesson you will discover How to Draw a Body using Classical Drawing Methods.

How to Draw a Body – Measuring proportions
When it comes to the topic of “How to Draw a Body“, a fine artist must know and use the body proportions to depict a realistically looking body. This marble torso has a missing head and limbs; therefore, some proportions of the human body cannot be applied here. For example, you cannot base your measurements on a head size or the length of an arm. That is why the method of angles, as described previously, is particularly helpful in this case.
Knowledge of the human anatomy is essential when you think how to draw a body and making constructive artwork of a torso. The muscles and proportions of this sculpture are strikingly realistic. The antic Athenian sculptor, Apollonios, definitely knew how the human body is proportioned.
How to Draw a Body – Drawing in straight lines
We started the drawing with long, straight lines and shorter, straight segments. After the proportions of the drawing are in place and the figure’s contours are indicated as rough outlines, we can continue to define the torso contours with greater precision.
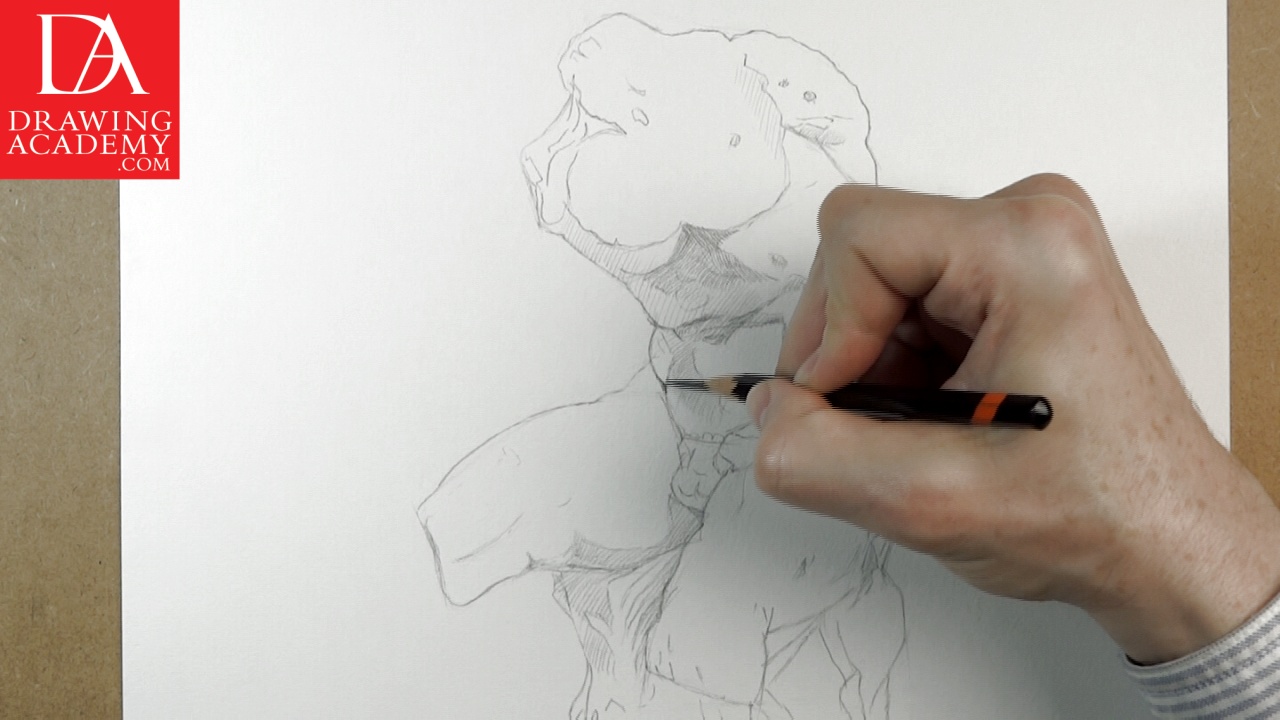
There are still some contours that are yet to be marked on my paper. For these new contours, I am using straight lines, which will be smoothed out and modified later.
How to Draw a Body – Negative spaces in drawing
When it comes to a topic of “think how to draw a body“, I want to say a few words about the negative space drawing approach. If you are not familiar with this approach, it is a way of drawing an outline by looking at the outer space surrounding the model.
For example, this outline can be seen as the part of the space that lies immediately next to the body, so instead of looking at the body’s shape, we are looking at the geometry of the surrounding space.
When you think think how to draw a body, it is good to be aware of this method as it can be used for double-checking the correctness of the drawn outlines. However, do not rely on it too much. This is just one of the ways to check line precision, but not the fundamental way of drawing.
Contemporary art education pays too much attention to the negative space drawing approach when it comes to the “think how to draw a body” subject. This can be damaging for an art student’s education process. Instead of developing their skills to see models as three-dimensional objects and practice constructive drawing approach, students shift their attention to simply copying outlines related to negative spaces. This limits their development from learning to draw in a classical way, which has been proven by many generations of fine artists throughout several centuries.
So, my advice regarding the negative space when considering think how to draw a body, will be as follows: Be aware of it, know how it works, practice a few times so you will have the skill, and use it only when in doubt to whether your outline has the correct shape. You can check the accuracy of your outlines with negative spaces, but do not rely on this approach to copy visible outlines.
The main difference between the amateur artist and a proficient master is that the master knows how to draw a body; the amateur is able to copy. To develop your drawing skills and become a pro, practice constructive drawing of positive masses instead of copying outlines of negative shapes.
How to Draw a Body – Tonal values rendering
The classical traditional way of rendering shades:
The classical, traditional way of drawing was developed and refined by the Old Masters over many centuries and the proof that this approach works is displayed in fine art museums and galleries around the world. The Old Masters knew how to draw a body.
The classical way of tonal values rendering is when shading is started from the dark shadows.
Thinking of how to draw a body by making a realistic artwork of a model, you need to understand its three-dimensional character and how light sculpts the model’s shape.
When it comes to the subject of how to draw a body, observe the model and analyze what form it has and how it is lit by the light. Note the light’s direction and which parts of the model are closer to the light source. These parts will have the lightest value of tonal range. Opposite of the light source are the parts of the model, which will have the darkest tonal values. For example, this torso is lit from above with the light source coming slightly from the right hand side.
The brightest parts of this torso are its top planes. The light tones include: the upper part of the figure’s left shoulder, the damaged surface of the neck and the left hand and the top planes of both its legs because they are directly exposed to the light.
The light comes in an oblique direction to the left side of the figure and vertical side-planes of its legs; therefore, these parts of the torso will generally have mid-tones.
All under-planes of this sculpture have no direct light whatsoever and only reflected and diffused light brightens up these surfaces. That is why these areas have core shadows together with the form shadows.
Deep shadows are also casted under the chest as this body slants forward in the sitting position. Cast shadows are usually very dark and comparable in tone with core and form shadows.
When going through the process of how to draw a body by rendering shades, the fine artist ought to build up tonal values of the entire artwork simultaneously. This means that instead of concentrating on a particular area for a long time, it is better to work on various areas of the drawing, changing the focus of attention from area to area in a quick succession.
When you’re rendering a particular part of a model, always look on other parts and compare tonal values of those parts to the area you’re working on. Such a drawing approach will help you to keep ratios of tonal value under control.
Considering how to draw a body, constantly think about the tonal values of the drawing by asking yourself questions like: Is the cast shadow under the chest darker or lighter than the core shadow of the leg? How much of the core shadow is darker than the form shadow? Is the high contrast between the light and the cast shadow at the chest’s edge making this cast shadow appear darker than it actually is? If so, how much darker does it appear due to this optical illusion?
Such a conscious attitude in the “how to draw a body” process will make your drawing skills develop much faster. As the result of such questions, you will get a more realistic looking piece of artwork, as well.
Making gradual progress with shading will mean that shadows rendered beforehand will eventually become relatively lighter than required. You will need to come back to already rendered parts of the drawing and increase their tonal values once again. This process may repeat several times. Every time you progress in tonal values – let’s say from shadows to mid-tones – the shadows will have to be deepened. The same applies to the progression from mid-tones to lights. When light areas of the drawing are touched up with graphite pencil, the shadows and mid-tones will have to be rendered over once again.
Initially, the tonal rendering goes from general big masses to smaller parts and details. First, make sure you block common areas of shades, so there is a clear division of light and dark regions on the drawing. Then you can move forward to smaller parts of the drawing, revealing individual characteristics of particular shaded areas.
Later on, continuing the “How to draw a body” video lesson, the shading will return to the common big masses once again to unify the drawing.
- Receive 15 new videos monthly (45 in total)
- Incredible discount – $4,164
- Bonuses - Fine Art eBooks and Videos
- Drawing Academy Diploma of Excellence after course completion in 3 months
- Personal coaching by Drawing Academy Tutors
- Lifetime membership. Free after the 3rd month

- Immediate access to all 45 video lessons
- Incredible discount – $4,198
- Bonuses - Fine Art eBooks and Videos
- Drawing Academy Diploma of Excellence after course completion in 3 months
- Personal coaching by Drawing Academy Tutors
- Lifetime membership. No more payments