Drawing Something by Rendering Shades
Video Lesson Description
In this video part you will discover classical rules of drawing something by rendering shades in graphite pencil.

Drawing Something with Geometrical Shapes – Rendering Still-life Shades
When it comes to drawing something by rendering shades, it is good practice to start shading from the darkest areas of the drawing. As the pencil you use has its limitations in depth, it would be much safer to start gradually darkening up shades rather than start in full strength on a light side of the object and then run out of the pencil grade half way through the drawing.
Remember, when drawing something, a good drawing always looks complete. It might be unfinished, but it will look like an artist intentionally left it that way.
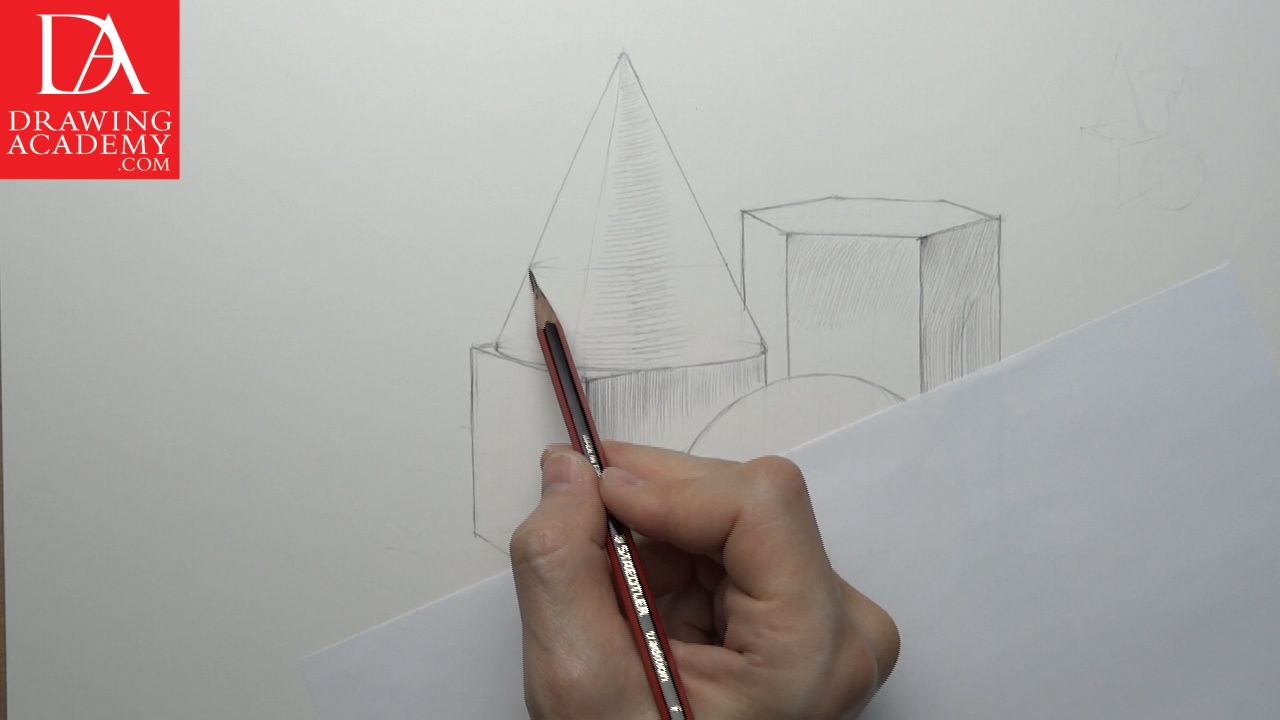
To protect your artwork from smudging when drawing something, keep a clean piece of paper under your hand.
When drawing something, some amateur and self-taught artists work on shading from top-left to the bottom-right to avoid smudging. Professionally speaking, working top-left to bottom-right by rendering to completion certain areas of a drawing while leaving other parts untouched is complete nonsense, even though it makes perfect sense in painting a fence or a wall – you cover the surface to perfection in one go and keep progressing from one side to another. It doesn’t work the same way in a traditional drawing. You are a fine artist, not a handy-worker.
The good professional drawing must look complete at any point of time during the process of drawing something. That is why your professional approach must be to work on various areas of drawing simultaneously without finishing one particular part before others are rendered to the same degree.
It is like developing a photograph – you do not place one corner of the photo into a chemical solution and wait until it is done to the full strength before dipping another corner to repeat the developing of another area. Instead, you submerge the whole photo and develop all areas at once. The same goes for the shading rendering in graphite pencil when drawing something. You work on various areas for a short time moving from one to another and returning to previous places as required. You are constantly comparing the depth of various shades to each other and deepening those areas that are underdeveloped. You are also starting from the darkest areas and moving toward lighter ones as the drawing progresses. I hope you can see now why when drawing something the top-left to bottom-right approach is erroneous in classical drawing.
Do not forget to sharpen your pencil frequently. It must become a habit of keeping your pencil sharp drawing something. A good pencil, knife or scalpel should always be nearby. You can also use a file-board with attached sandpaper to sharpen the graphite tip. Needless to say, pencil sharpeners are for children’s safety for a reason; as a professional fine artist, you don’t need such a toy.
Rendering tones also represents the relationship between objects. You can notice how reflection from the sphere lightens up shadow planes of the cube and the hexagon. At the same time, it hardly affects shading of the cone as the cone’s surface is tilted away from the sphere.
This is something you need to know and understand while drawing something in order to see it clearly. Here is the rule of bouncing light: the angle under which the light beam bounces off the surface is equal to the angle under which light hits the surface. Test this theory with a mirror. You see your reflection if you look directly into the straight positioned mirror, turn the mirror away and you will see it in other directions without turning your head.
I need to say a few words about rendering techniques when drawing something. Some self-taught artists use ‘slinky’ forth-and-back pencil movements for gradually building up tonal values. It might be acceptable for an amateur beginner, but not for a professional fine artist.
Ideally, when drawing something, you should start every pencil stroke at one point; go along the direction required while applying the necessary pressure and curvature. Then lift your pencil, bring it back to another starting point and repeat the exercise several thousand times varying starting and ending points, directions, pressure, vibrancy, and so on. You do not scribble your pencil absentmindedly without lifting it! This is what you do for a doodle, not for a professional drawing.
I also want to point your attention to graphite smearing or blending while drawing something. Professional fine artists do not smear graphite pencil. If you have done it before, it is time to improve your skills and forget about graphite blending forever. Graphite blending gives a messy and amateurish appearance. If your art teacher allows you to smear graphite pencil, it is time to change your teacher; you have outgrown his skills.
Well-rendered hatching can be achieved in many layers of delicate cross-hatching strokes with a well-sharpened pencil.
- Receive 15 new videos monthly (45 in total)
- Incredible discount – $4,164
- Bonuses - Fine Art eBooks and Videos
- Drawing Academy Diploma of Excellence after course completion in 3 months
- Personal coaching by Drawing Academy Tutors
- Lifetime membership. Free after the 3rd month

- Immediate access to all 45 video lessons
- Incredible discount – $4,198
- Bonuses - Fine Art eBooks and Videos
- Drawing Academy Diploma of Excellence after course completion in 3 months
- Personal coaching by Drawing Academy Tutors
- Lifetime membership. No more payments