Drawing a Face – Rendering tonal values in graphite pencil
Video Lesson Description
In this “Drawing a Face” video part you will discover the sequence of the classical method of portrait drawing. This method has been used by professional fine artists for many centuries.

Drawing a Face
When drawing a face, a portrait drawing must progress from general masses to smaller details and then back to general masses, once again. This progression will ensure that you will not get lost from the beginning – depicting individual facial features – while general proportions of the head are not being established.
Without a good foundation, starting from small individual features will end up in a caricature rather than a realistic portrait.
When you are drawing a face, consider the following steps:
1. The portrait drawing begins with the composition on the drawing area. When drawing a face, have a good look at the model from different points to decide which view you want to portray. Make a decision on whether your sheet of paper will have a vertical or horizontal layout.
2. After deciding on the drawing layout, either vertical or horizontal, you need to visualize the drawing a face process and consider how your future portrait will fill the drawing area. This includes the portrait’s size and location on the drawing area.
3. Now you can take your pencil and mark the boundaries of your future portrait. Drawing a face, you need to consider the lead or nose room, which I have explained in the previous video part. The lead room is not an absolute rule. For your specific purpose you may bend this rule or ignore it completely.
When this preparatory first step is completed, you can progress to the second step, which is the depiction of the characteristic shapes of the head, its proportions and position in space.
4. Drawing a face starts with very light pencil marks, all lines are thin and easily erasable at this point. It is easy to correct any mistakes by redrawing on top, if required.
5. When drawing a face, all shapes are drawn with a certain degree of simplification. You don’t need to pay attention to small details at this step. It is much more important to depict the overall proportions of the head, its tilt and main masses. At this step, your task is to portray the character of the head. Ask yourself such questions as: “Is it big?” “How round is it?” “What is the head’s tilt?” “What angle are you seeing the head at?”, and so on. You can also mentally compare the head to some objects like nuts, for example. Ask yourself…”Does this head look like a nut or is it a nut placed upside down?”
6. When main masses of the head are marked down, you can progress to individual features like eyes, nose, mouth, the lower jaw, forehead, cheeks, etc. It is important to see those features not only as outlines or contours, but as planes of the three-dimensional shapes.
7. The geometrical approach of shapes with planes applies to all other parts of the head and to the drawing a face sequence. The linear constructive drawing is a vital part of a good portrait. The classical method gives a lot of attention to this stage. When the head’s construction is done correctly, the portrait will have likeness from the very beginning; it will be believable and precise.
8. When drawing a face by making the linear drawing, the fine artist needs also to consider perspective and foreshortening.
9. After main head masses are done as approximate geometrical shapes, the outlines and contours need to be fine-tuned as close to the actual shapes of the model as possible. At this ‘drawing a face’ step, the fine artist must pay special attention to the individual features of the model. This includes: the shape of the eyes, the nose, the mouth, ears, individual curls of the hairstyle and so on.
10. When it comes to the hairstyle, the fine artist must understand that the mass of hair covers the head – repeating its shape.
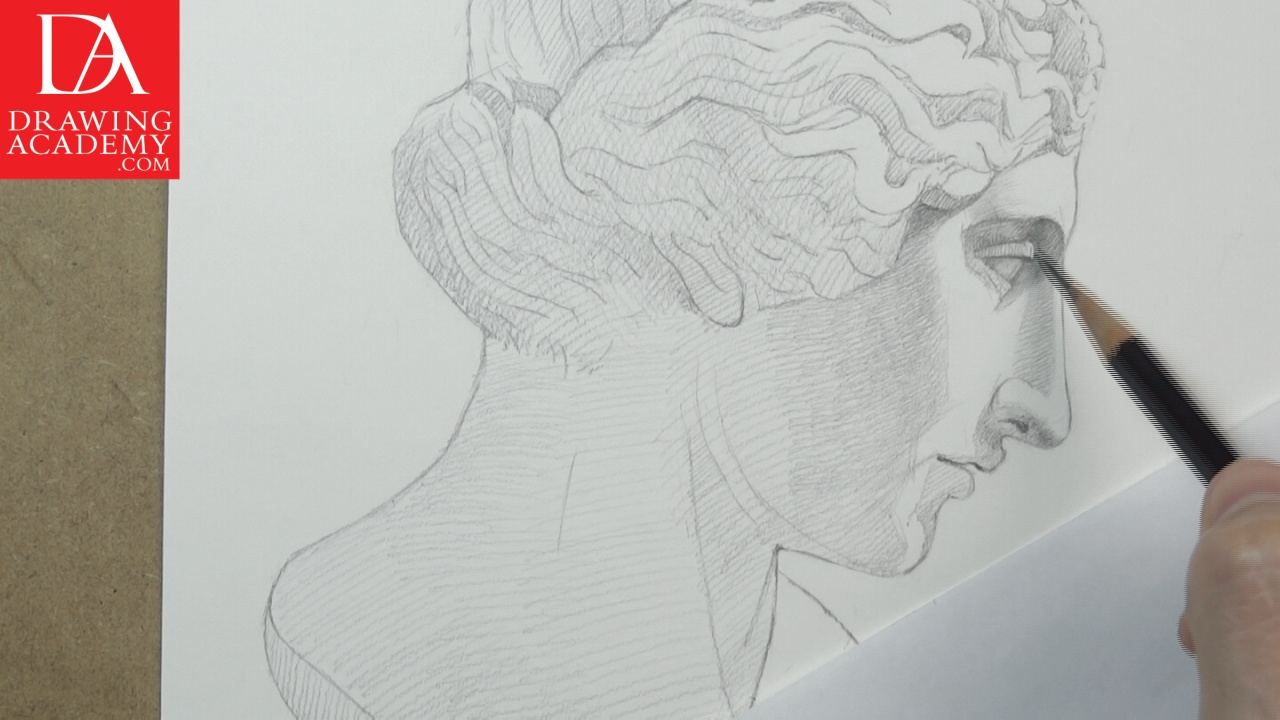
11. The next step of drawing a face is to reveal a three-dimensional shape of the head by means of rendering the tones.
12. The tonal rendering of drawing a face begins with the darkest shades on the head. These places will be opposite to the light. The core shadows are marked in pencil hatching. These core shadows are usually nearby the boundaries between light and shade on the head surface.
13. When drawing a face, the rendering of tonal values progresses gradually from dark shadows to light areas. Do not attempt rendering shades in full strength from the first attempt. Instead, do it in many layers.
14. After the main masses of shadows and mid-tones are indicated on the drawing, the fine artist can progress to the next step, which is rendering tones with attention to smaller details.
15. When modelling a three-dimensional object in tone, you need to depict the simplest tonal values – the shadows, the mid-tones and the light. All gradations, including reflected light, can be taken care of after these three values are established.
Some so called art teachers advocate the five-pencil drawing approach – when light areas are drawn with hard grade pencils, mid-tones with medium grades and dark shadows with soft grade pencils. This is an amateurish, unprofessional method. It is especially bad for beginners. Instead of developing drawing skills and training the hand, a beginner will get used to relying on the limitation of the tonal range of drawing tools – pencils with various grades. Classical drawing can produce beautiful results with just one or two pencils. Think of the Old Masters, who didn’t rely on the full range of an art supply shop and were able to create masterpieces that are admired in these present days.
When smaller details are rendered with necessary attention, the fine artist returns to main masses and once again works on the big areas of the drawing. This step unifies the whole drawing and visually combines all tonal values into one artwork.
This is the final step, after which the fine artist might decide to stop working on the portrait drawing.
I hope this step-by-step description of the drawing a face lesson on classical portrait drawing will be useful to you.
Take this knowledge and put it to good use. Only practice will improve your portrait drawing skills.
- Receive 15 new videos monthly (45 in total)
- Incredible discount – $4,164
- Bonuses - Fine Art eBooks and Videos
- Drawing Academy Diploma of Excellence after course completion in 3 months
- Personal coaching by Drawing Academy Tutors
- Lifetime membership. Free after the 3rd month

- Immediate access to all 45 video lessons
- Incredible discount – $4,198
- Bonuses - Fine Art eBooks and Videos
- Drawing Academy Diploma of Excellence after course completion in 3 months
- Personal coaching by Drawing Academy Tutors
- Lifetime membership. No more payments